Jewelry
Jewelry printed with FDM
Here are some of the jewelry pieces I’ve printed using FDM. I recommend coating them with food-safe resin if you plan to wear them often, so the plastic does not come into direct contact with your skin.
This heart was printed in two parts, glued together, and then attached to a chain.
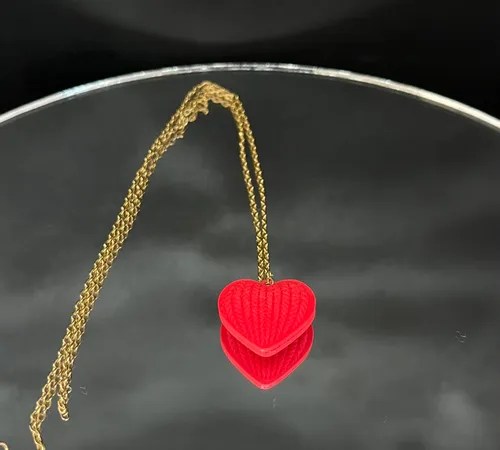
Model: Knitted Heart
I was invited to a wedding, and the theme was “colorful”. I couldn’t bring the black dress I reuse all the time, so I had to think of a new outfit. I had a red skirt and a black-and-white dotted shirt, which could work.
I printed a rose as a brooch, held together with magnets. And, whoops, I ended up with a Sophie cosplay from Clair Obscure: Expedition 33. I swear it wasn’t intentional at first, but once I realized it was a possibility, I went with it. Some fellow gamers recognized the reference, and I was quite proud of it.
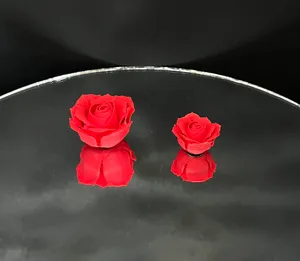

Model: Mini Roses
Below is the rose mounted on the shirt.
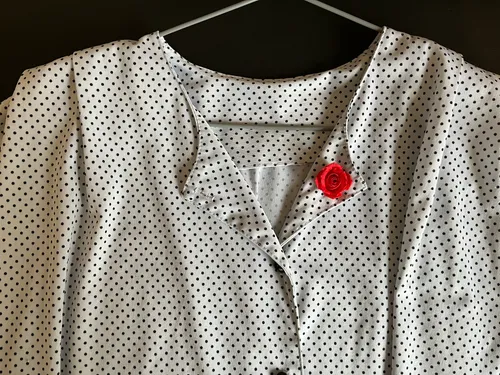
Model: Rose Shirt
The next print was challenging. I made a mistake.
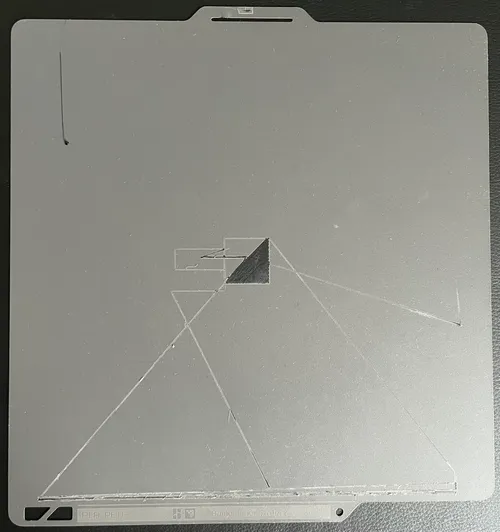
I bought a brand-new build plate for my printer, the “Bambu Cool Plate SuperTack”, determined to print smooth surfaces. I set up the model you see below, selected the correct plate in the slicer, and started the print with the new build plate.
The filament did not stick to the plate. I noticed it early, stopped the print, and cleaned it. I then looked into why it would fail on this new plate by reading Bambu’s community forum. Some people reported issues with this plate and mentioned that increasing the plate temperature by 10°C could help, so I did.
I started the print again. That’s when the hotend began scratching the plate as it moved, leaving large marks on it. At first, I didn’t understand why this was happening. I went back to the forum, trying to find similar issues and debugging what could have gone wrong.
My stupid ass decided to flip the build plate and try again with many different settings. I should have reused the already damaged side, since I wasn’t sure it would work. It failed again.
After some more thinking, I realized that the hotend wasn’t clean and had a blob of filament on it. This caused incorrect auto bed leveling, which in turn resulted in the hotend digging into the plate.
After thoroughly cleaning the hotend with a brass brush and dedicated tools, I did more research and more trial and error to better understand what had happened. I realized that the issue would not have occurred if I had used another model.
This model had the arachne wall, or “variable line width mode”, enabled. This setting can create finer, more detailed prints but may complicate the printing process. Without this setting enabled, the print seemed to work fine.
I also realized that this specific black matte filament would not stick to the plate, while other matte colors did. Before you say anything: yes, the spool was dry and stored properly. I read that black filaments may require higher temperatures to stick to the plate, so I tried increasing the temperature several times, but it made no difference.
By then, both sides were damaged, leaving the build plate barely usable, and I was still unable to get black matte filament to stick properly with arachne wall enabled
I eventually printed this set of earrings on my textured build plate, which worked fine. I printed four pieces so I could glue them together and have the little ghost on both sides.
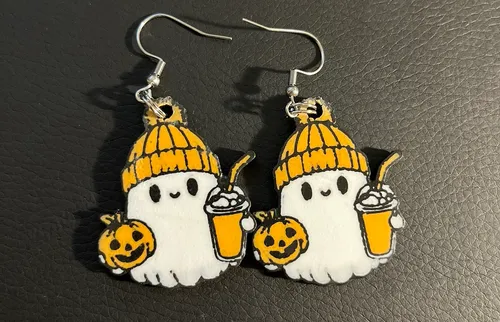
Model: Ghost Halloween Earrings
For a themed party Krayorn and I organized with the theme “Technology”, I wanted to make a costume representing “Ruby”, as in Ruby on Rails.
A friend of mine, Kodinette, sewed me a bright red dress, to which I added plenty of accessories.
I used a ring size measuring set to make sure the rings would fit, then printed several rings and glued fake gems onto them. These props were later reused for the pirate RPG party we organized.
I couldn’t find links for all the models, some appear to have been deleted.
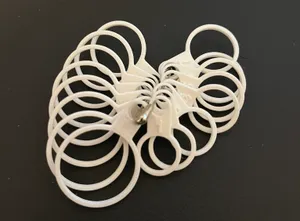
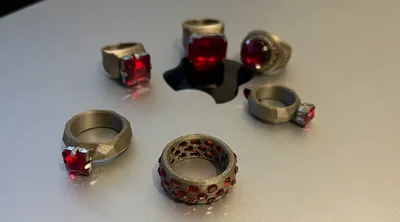
Models: Ring, Low Poly Ring, Fanboy Varsity Ring, Ring Holes, Ring Size Measuring Set