Warframe Void Relic
Void Relic prop from Warframe && LEDs
October 2024 was my brother’s birthday. He sent me this YouTube video saying he wanted his own Void Relic. This giga nerd has thousands of hours in Warframe. I had never used lights in a 3D print before, so it seemed like a suitable challenge.
The person who made the model kindly released it under a Creative Commons license, which meant I could use it.
First, I needed to print the parts. I scaled them down because the original prop files were huge. I used my filament printer with default settings and some supports. I printed everything in matte black filament except the top pieces, for which I used transparent teal filament so the lights could shine through.
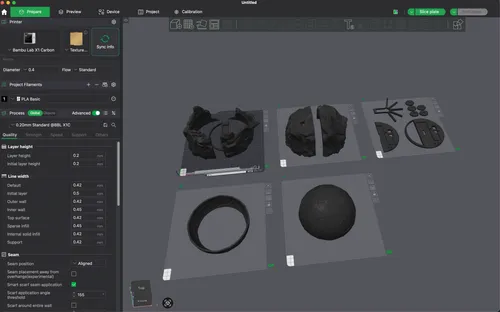
BambuStudio
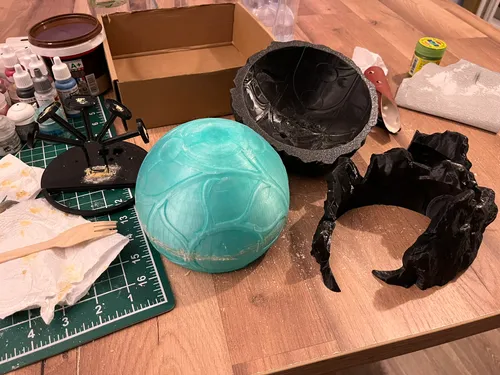
Once printed, I spent several hours sanding the parts. The result was not as smooth as I wanted, the top section was too thin to sand the layer lines completely. I could have used more supports and a finer layer height for a better finish.
To assemble the parts, I used super glue and wood filler to close the gaps.
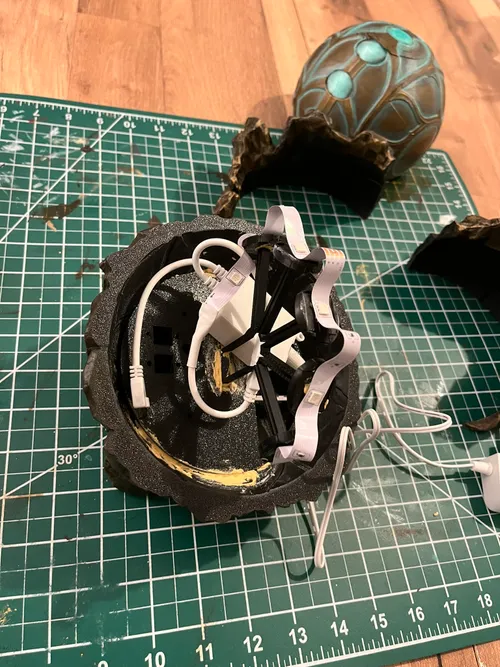
I placed the lights inside to test them. I used an LED strip with a remote control that I bought on Amazon. I still need to find more local sources for general electronic components.

Next, I primed the parts to get them ready for painting. I covered the round sections, where I wanted more light to pass through, with brown packing tape. The tape stuck too strongly and was difficult to remove, so I should have used a different masking material.
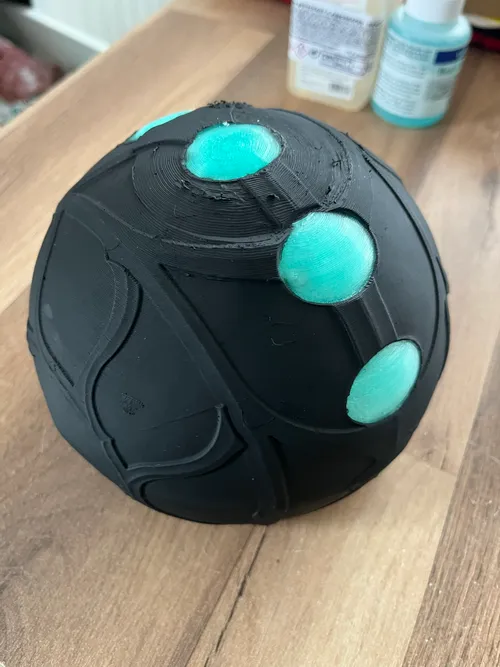
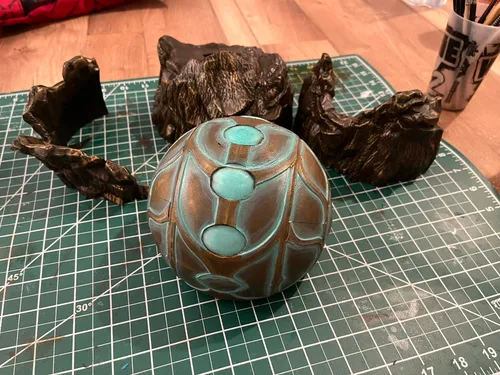
Alright, now the fun part, painting! The goal was a rusted copper effect for the egg and a rock-like texture for the base.
I added more wood filler inside instead of glue so the lights would stay aligned.
I should have painted the base after assembling it, but I didn’ to avoid repeating steps. Once the egg was installed, I had to glue, apply filler, sand again, and repaint.

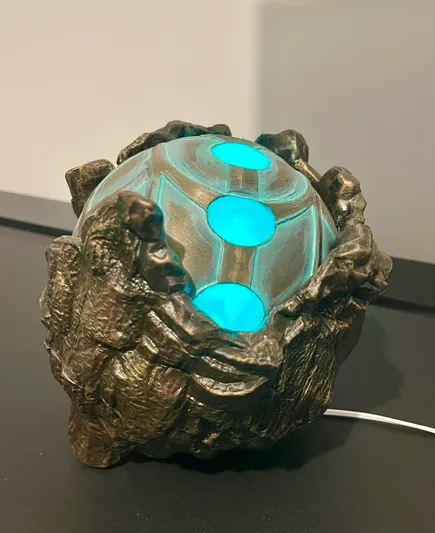
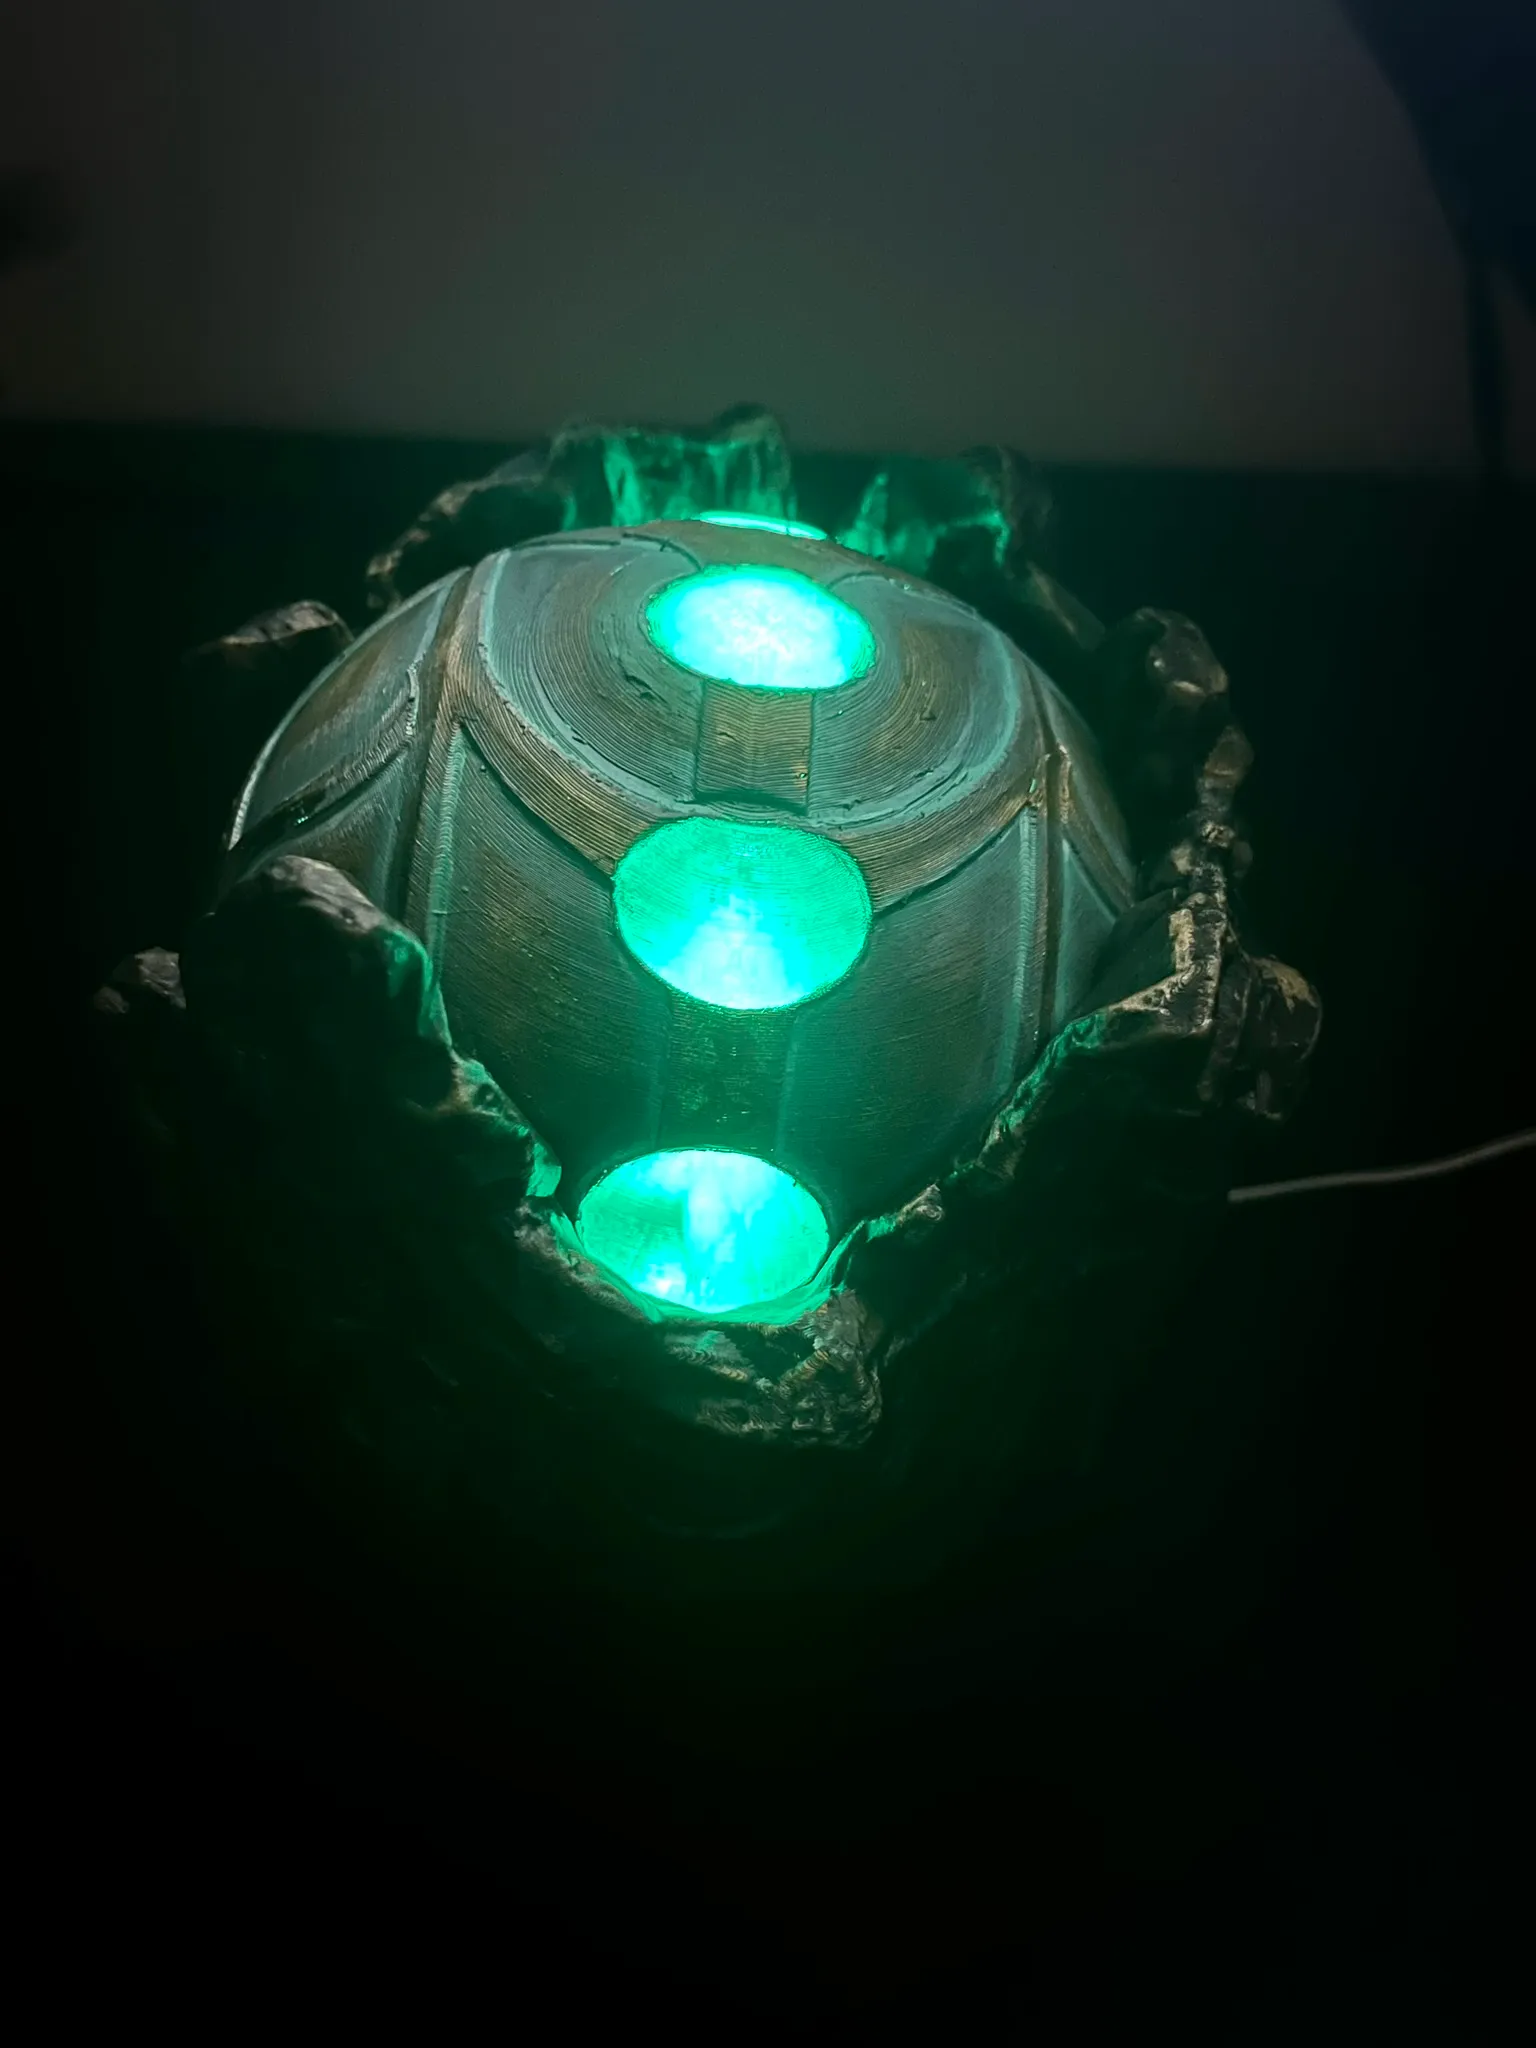
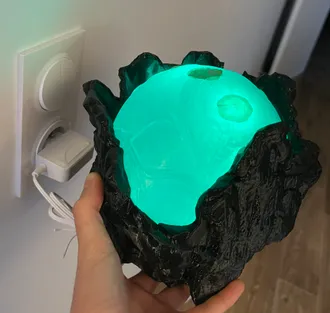
With all that done, here was the final result, both with and without the lights. Mission accomplished: a Void Relic ready to deliver blueprint !