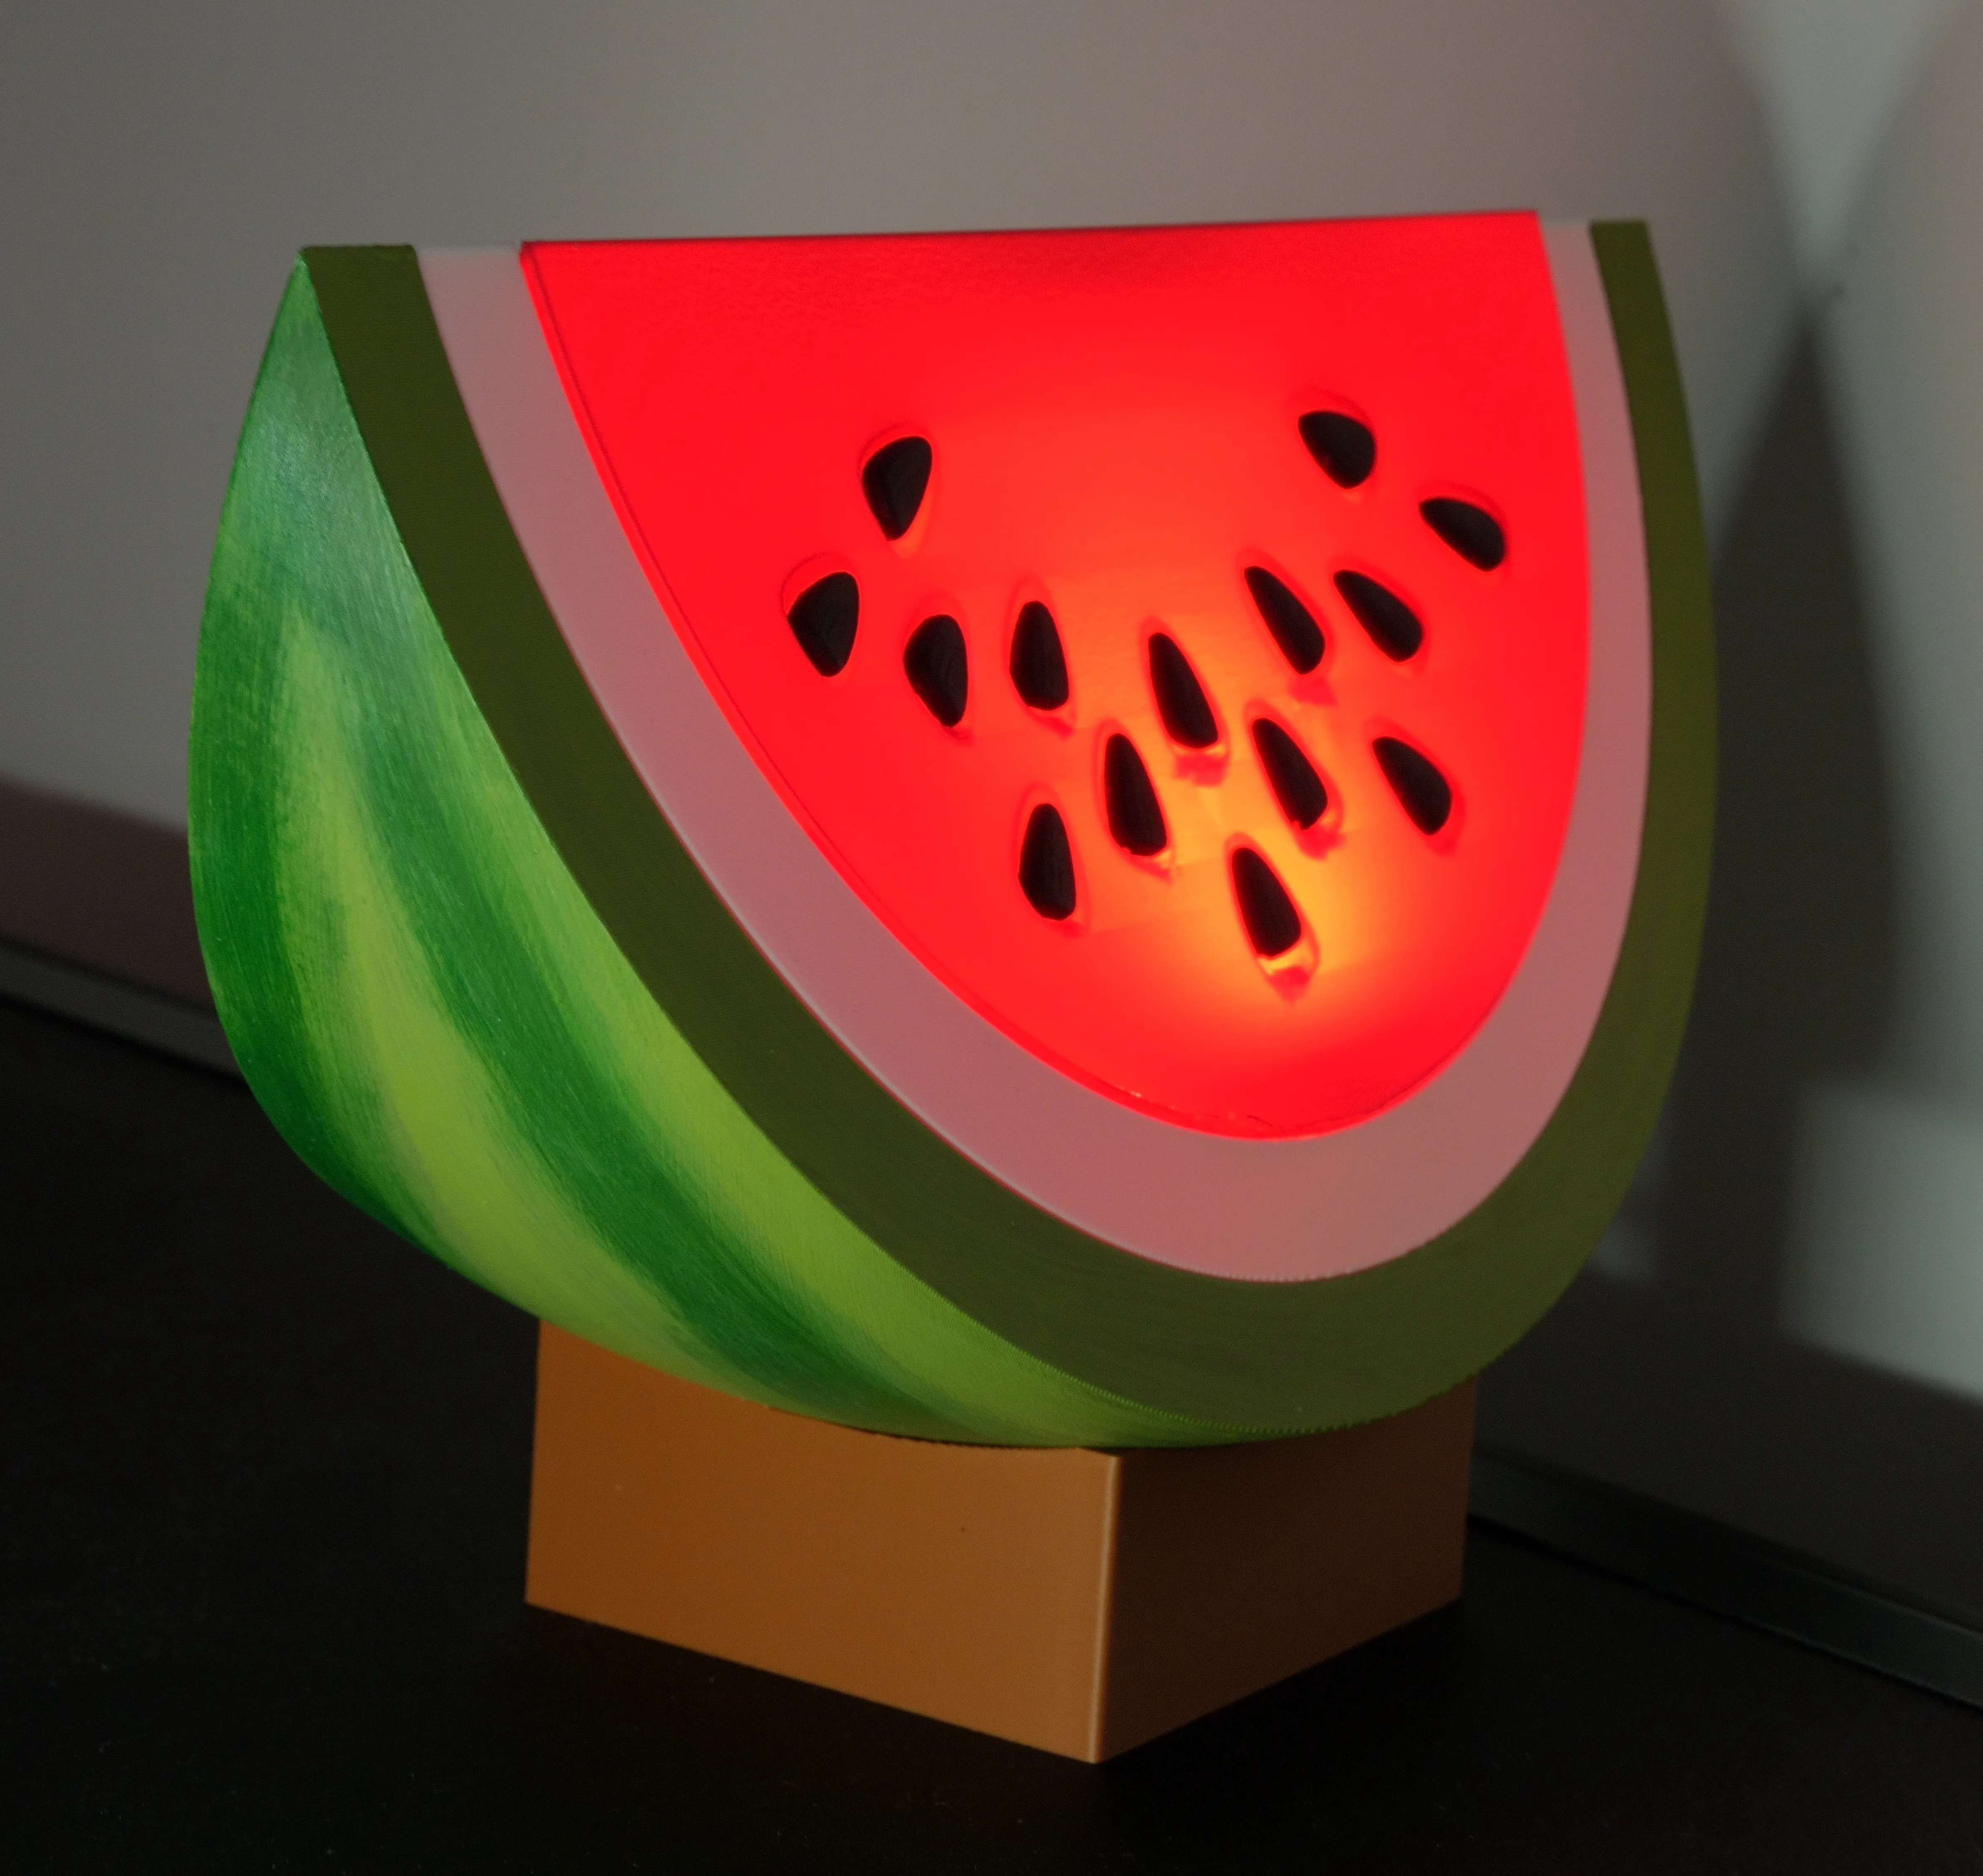
Watermelon Night Light
3D Print and modification of a Watermelon model turned into a night light
After making some items for my friend’s baby shower, she reached out to me a little later with an unusual request: she wanted a watermelon night light 🍉. Challenge accepted!
Well, that model didn’t exist yet. I used this model as a base, but it needed some work and planning to make it usable.
Here’s the original model in Bambu Studio:
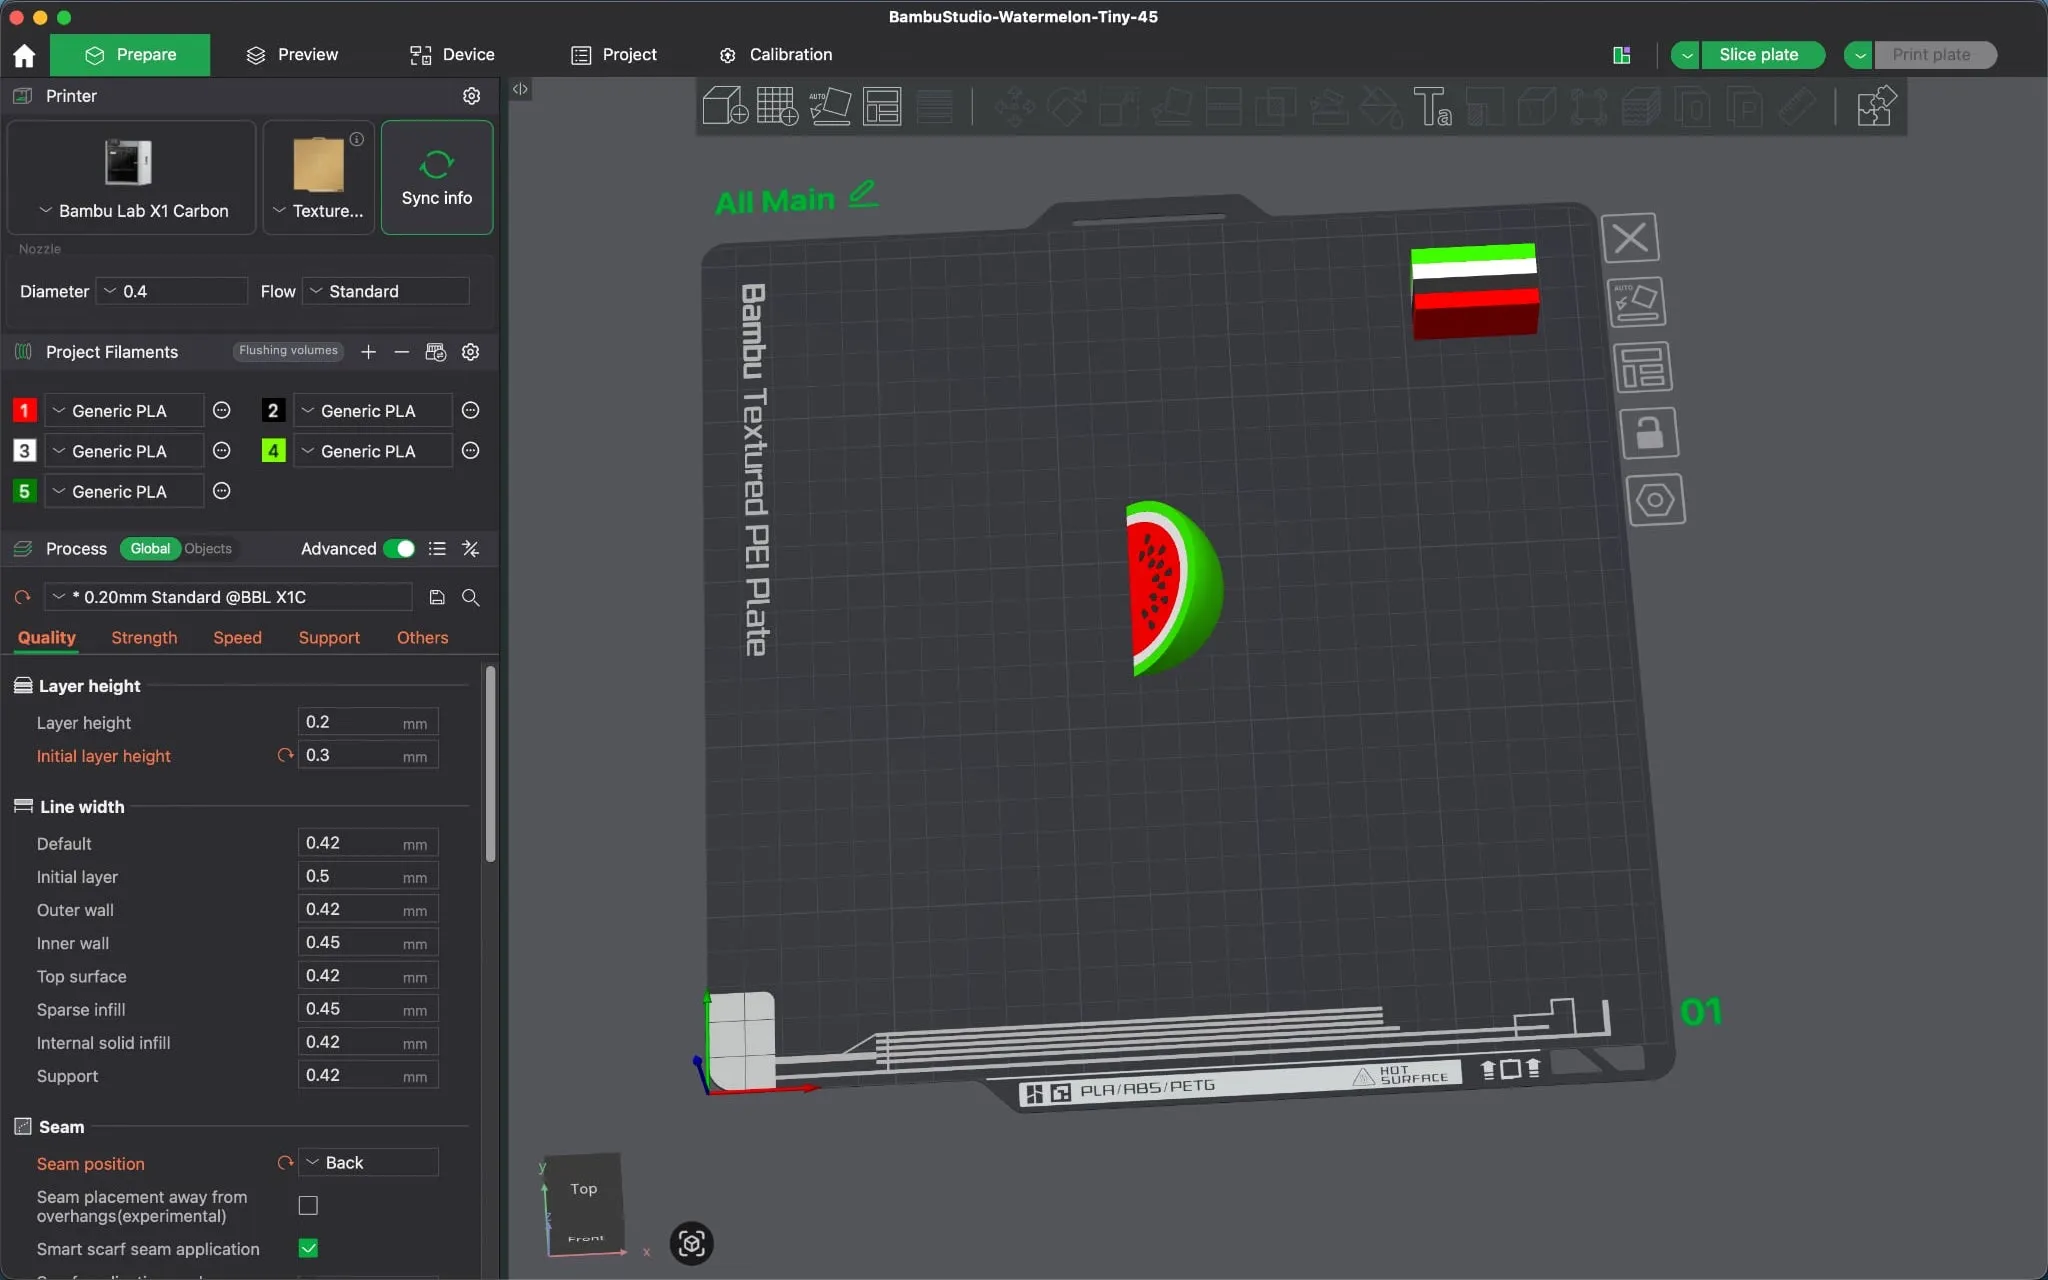
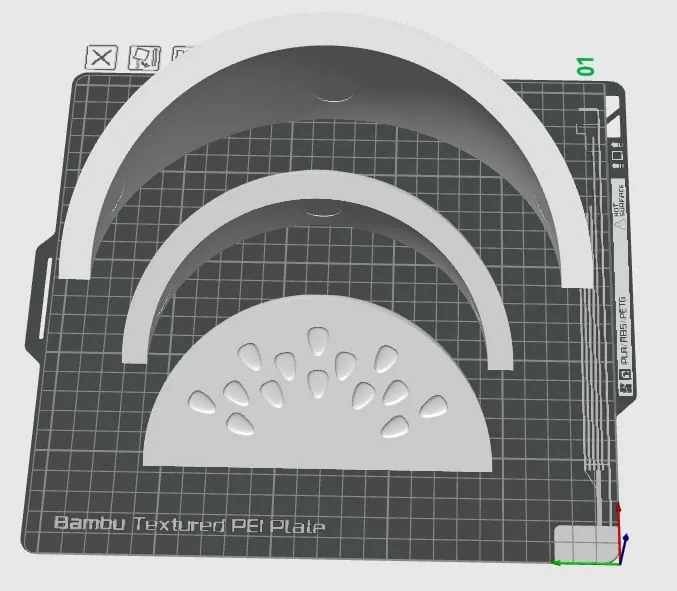
It can be split by object, which gives us four parts:
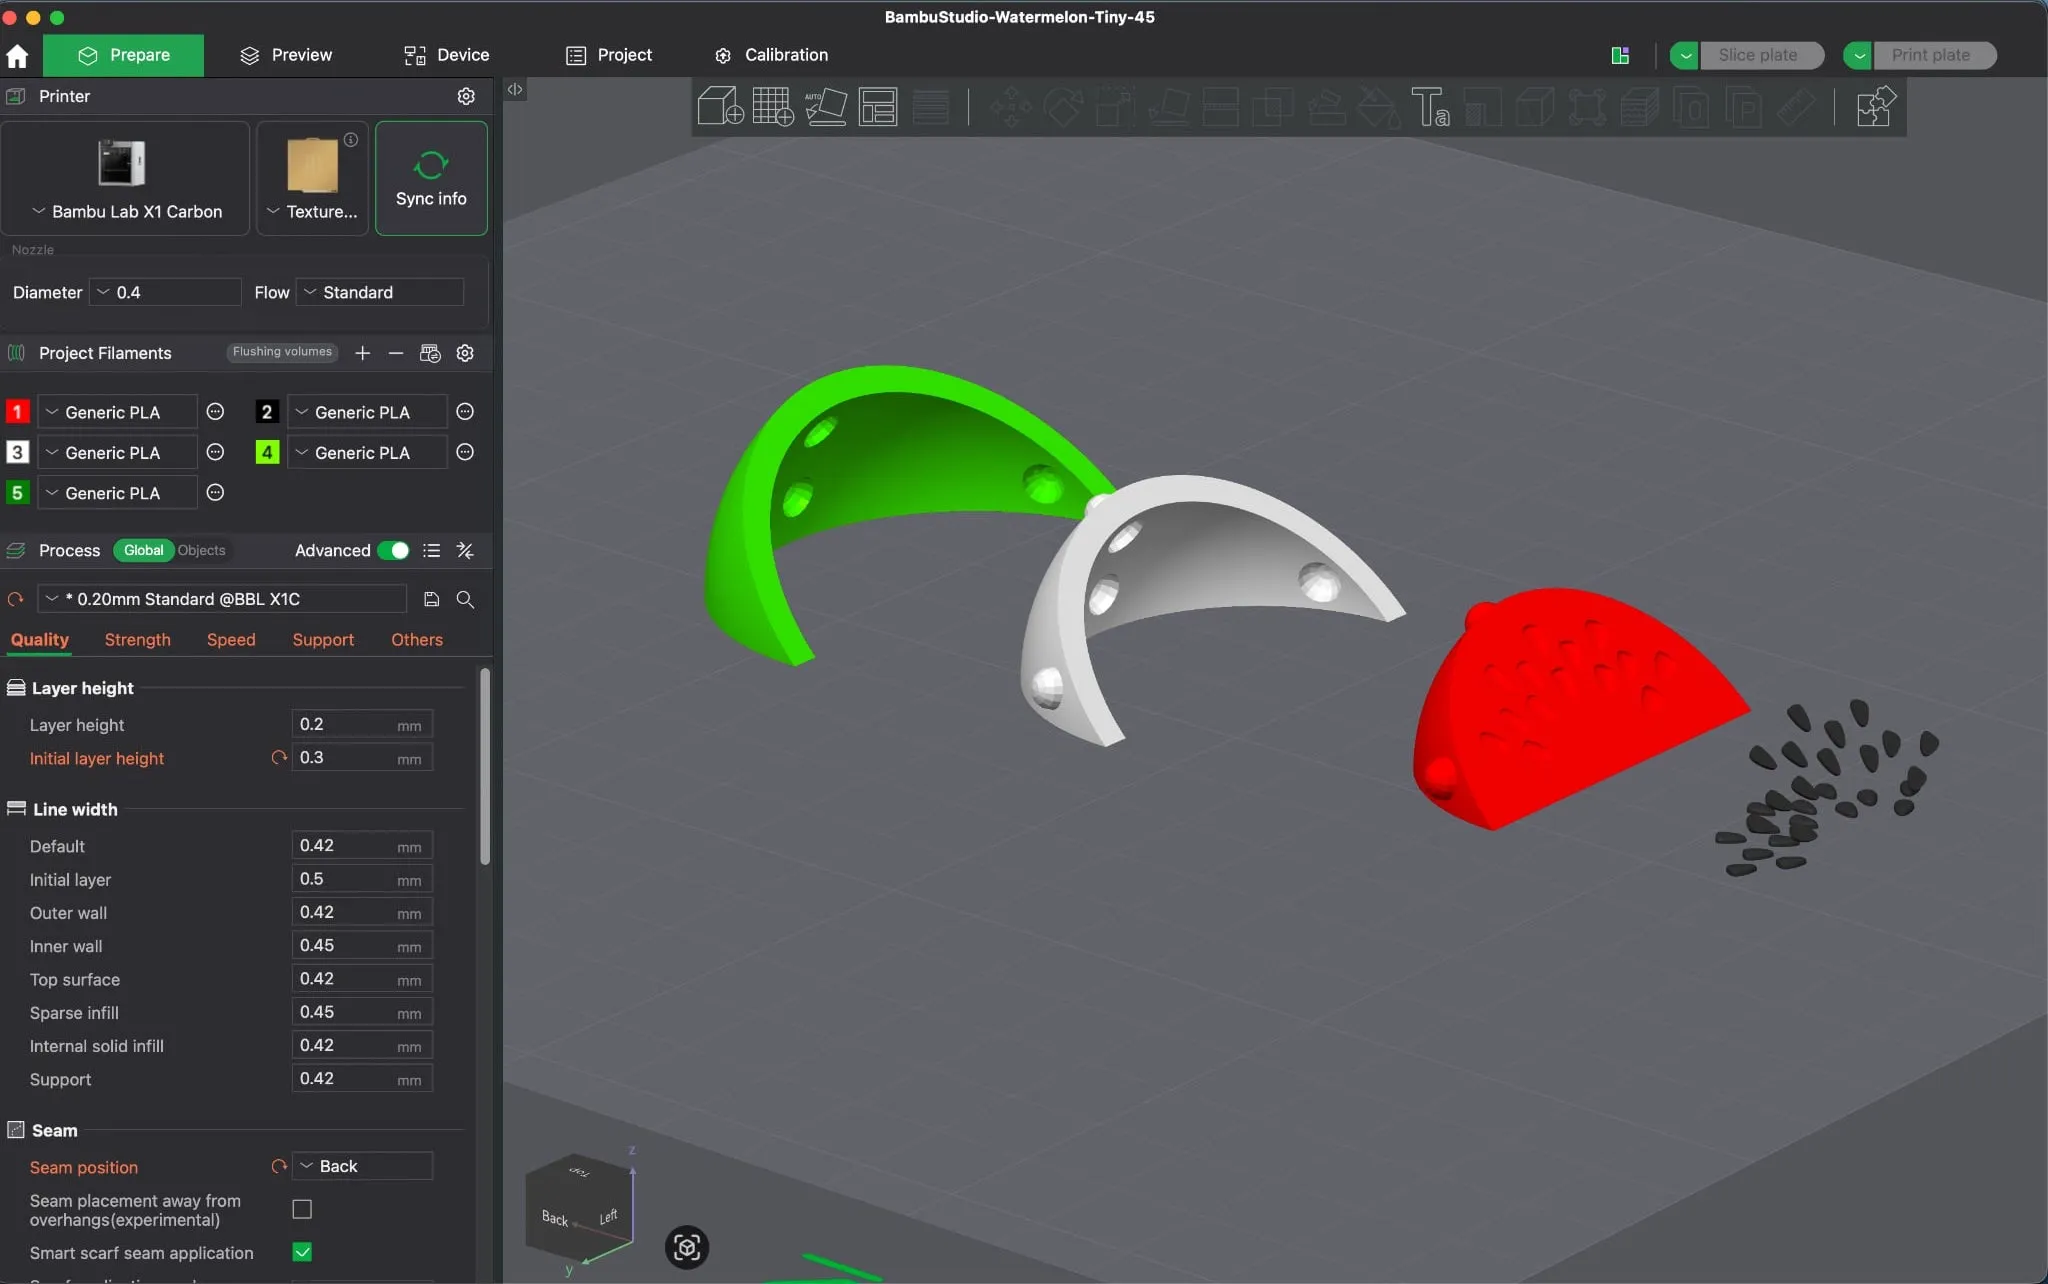
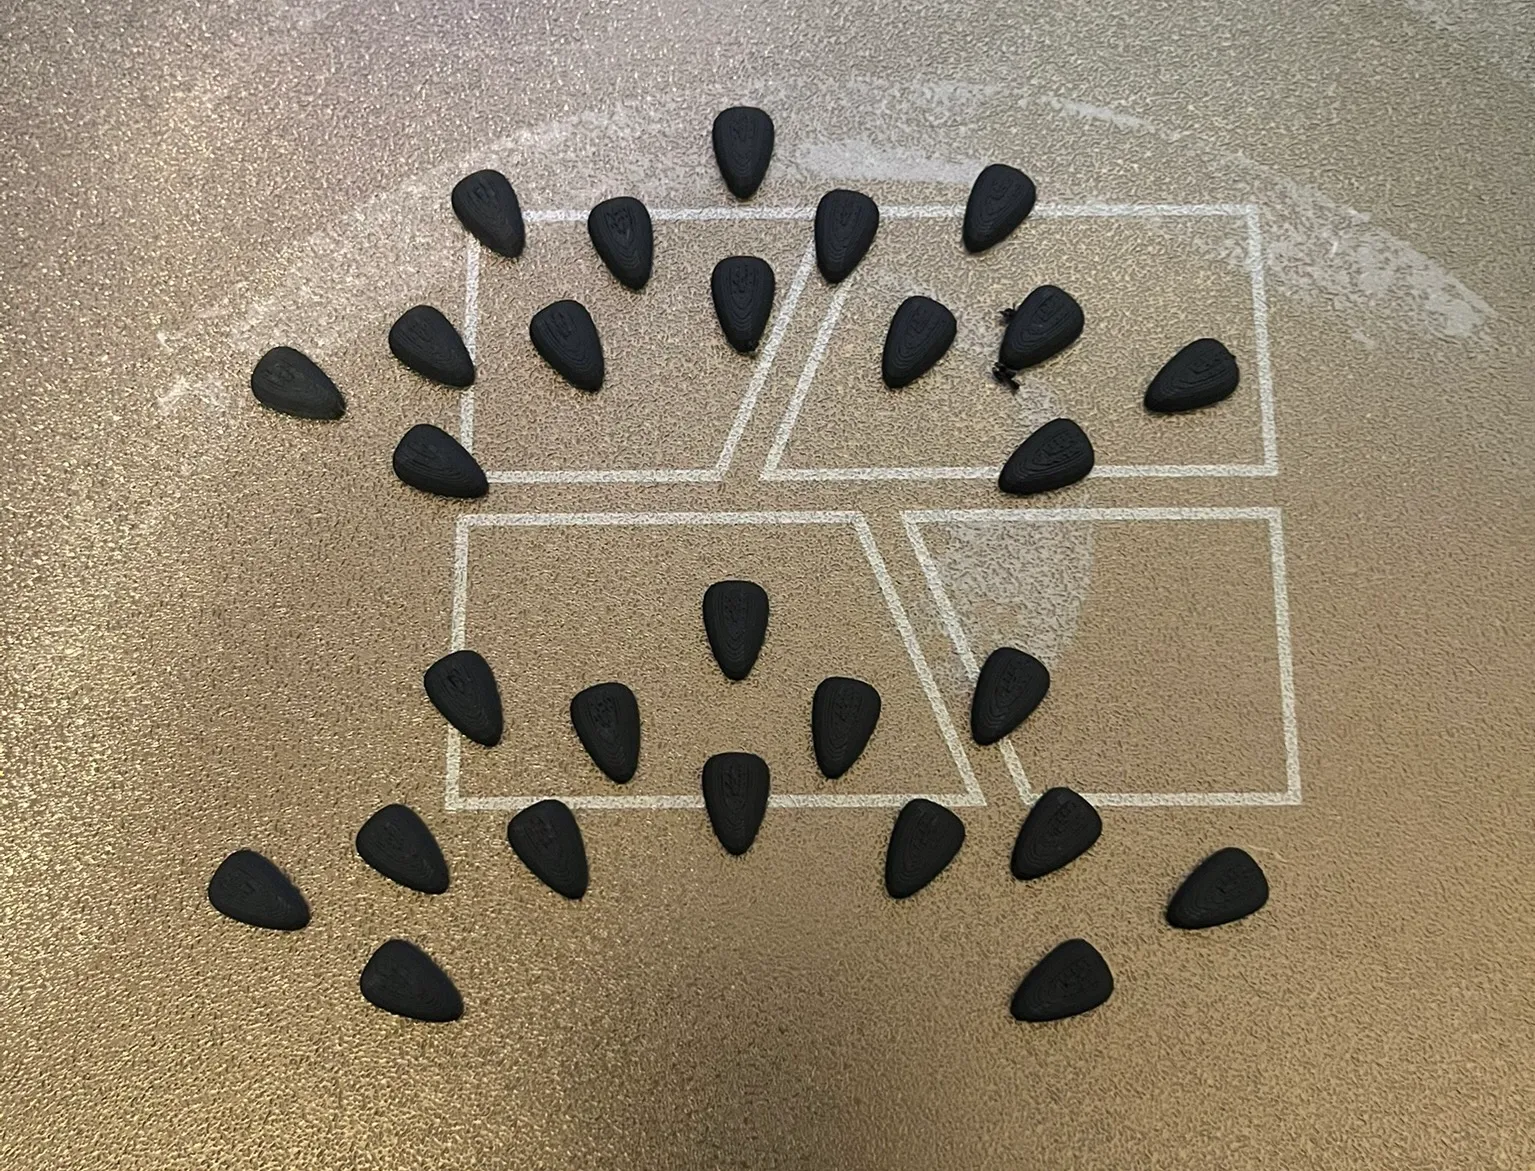
I cut the seeds so that I only had one side and printed them twice:
The four parts:

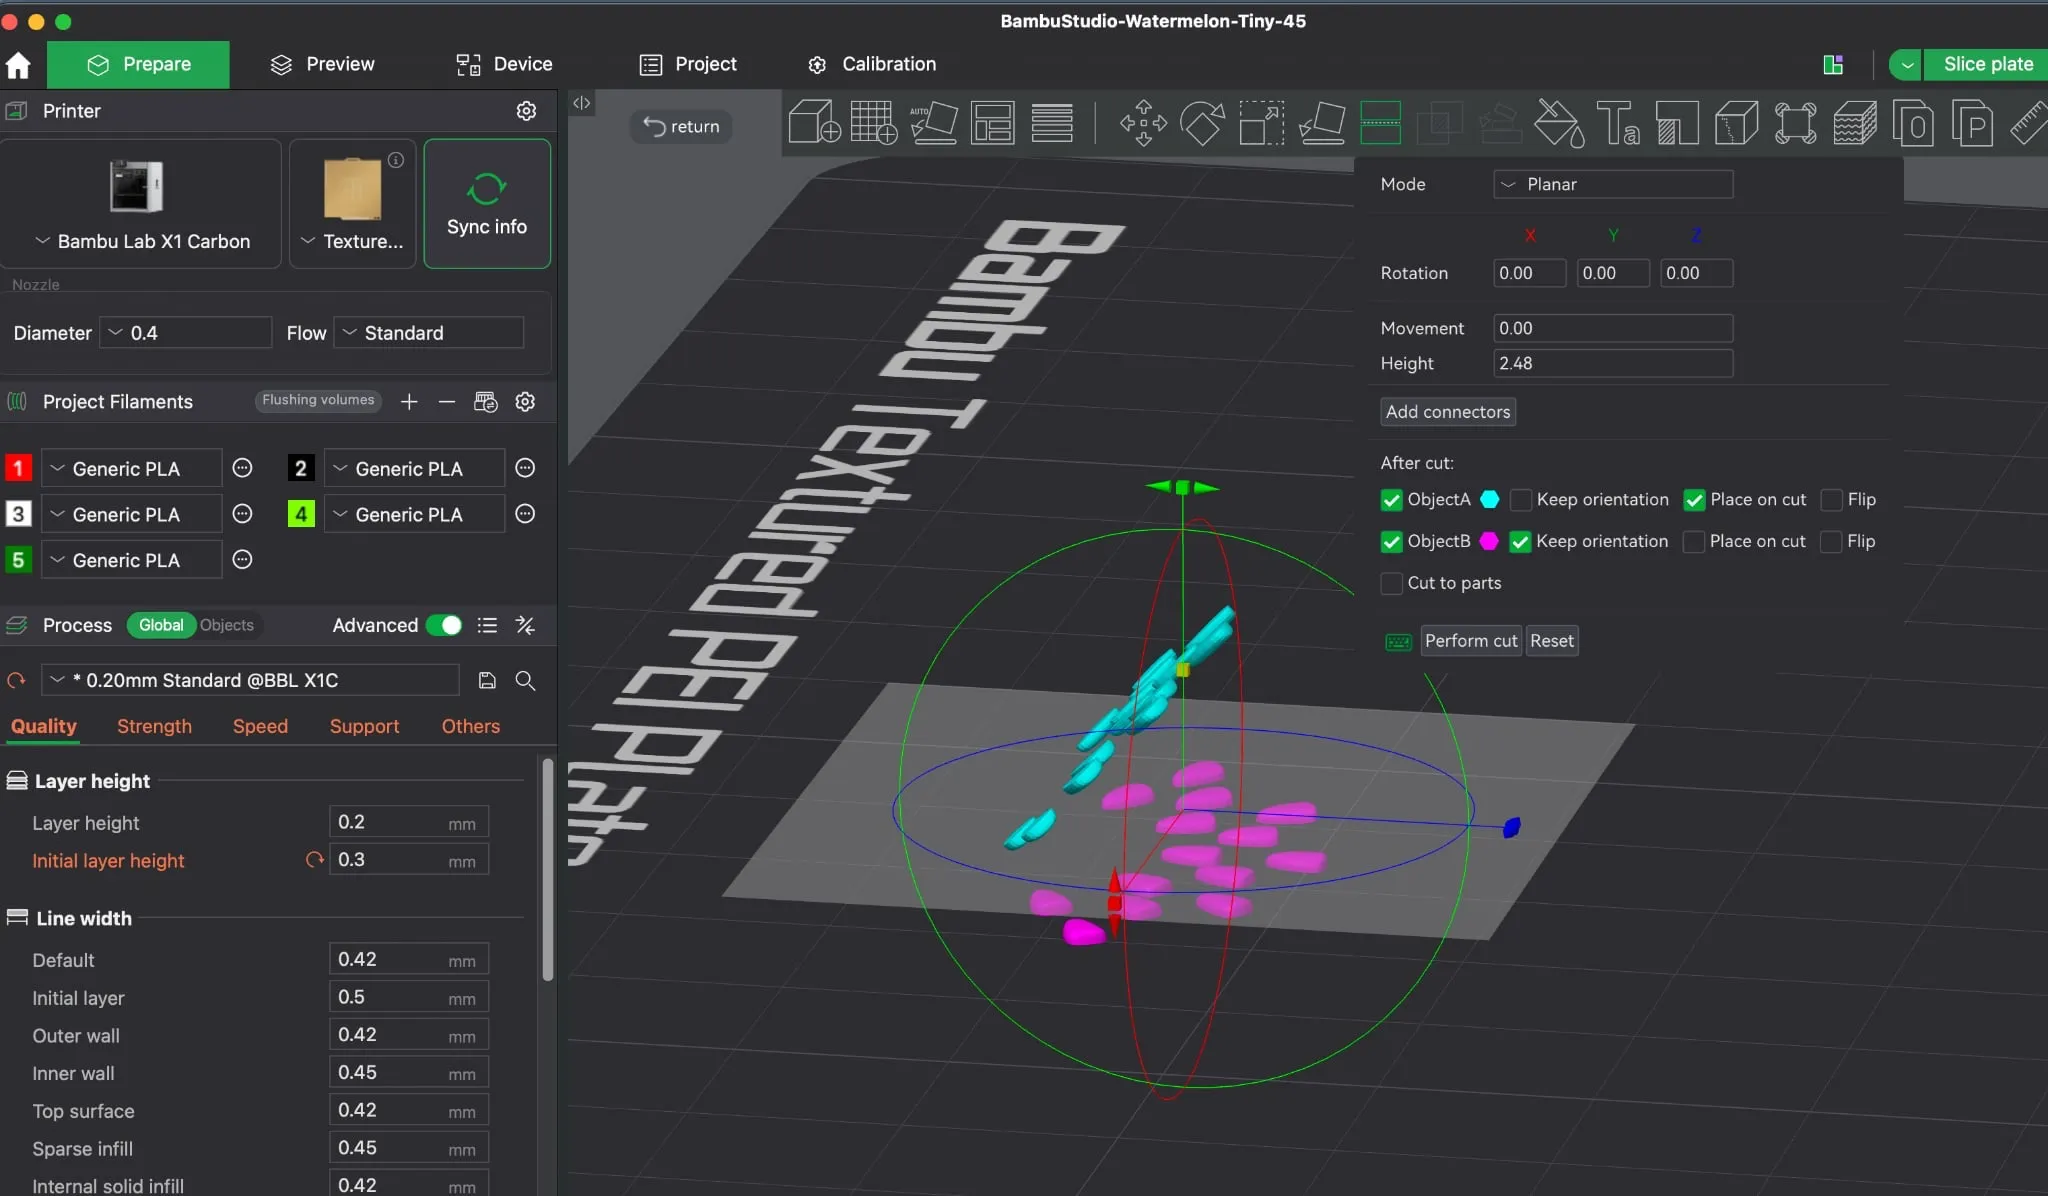
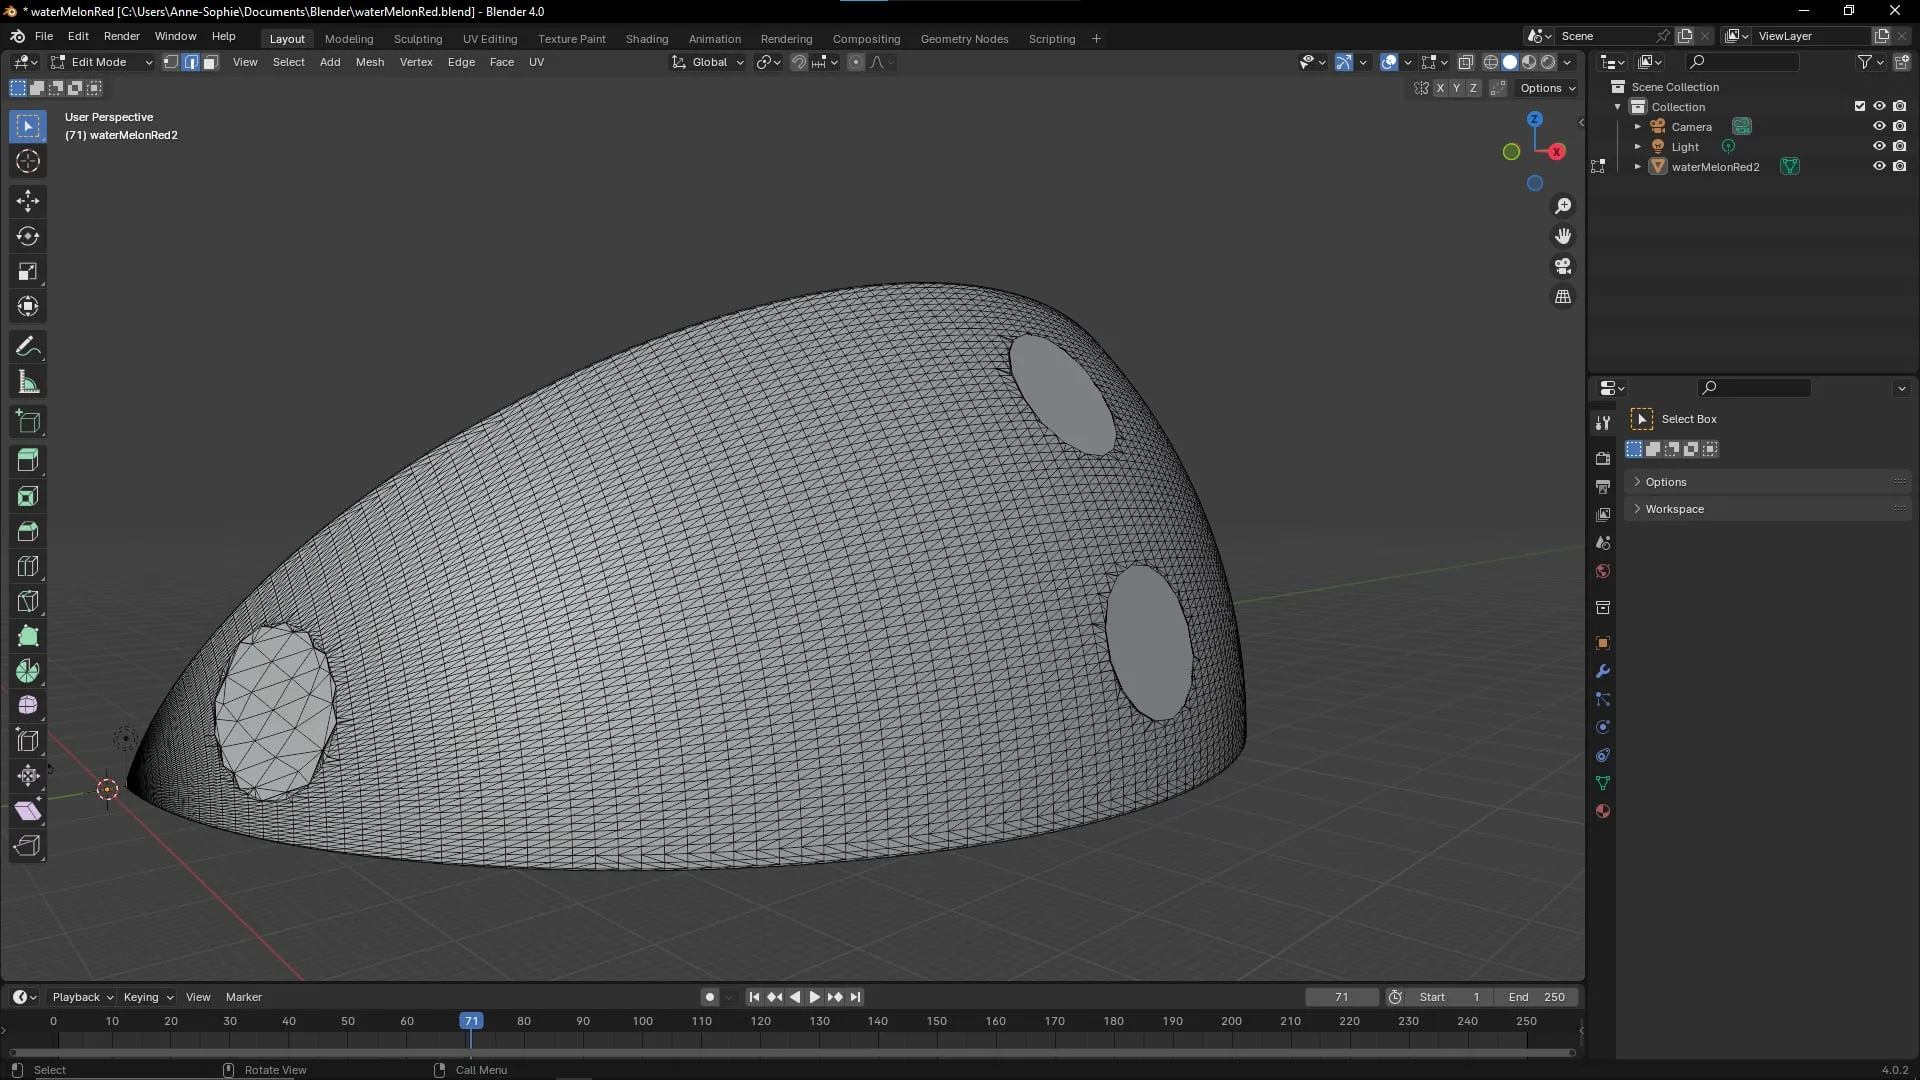
I modified the .stl files of each object in Blender by flattening the bumps so I wouldn’t need supports during printing.
The result in Bambu Studio with the three flattened parts:
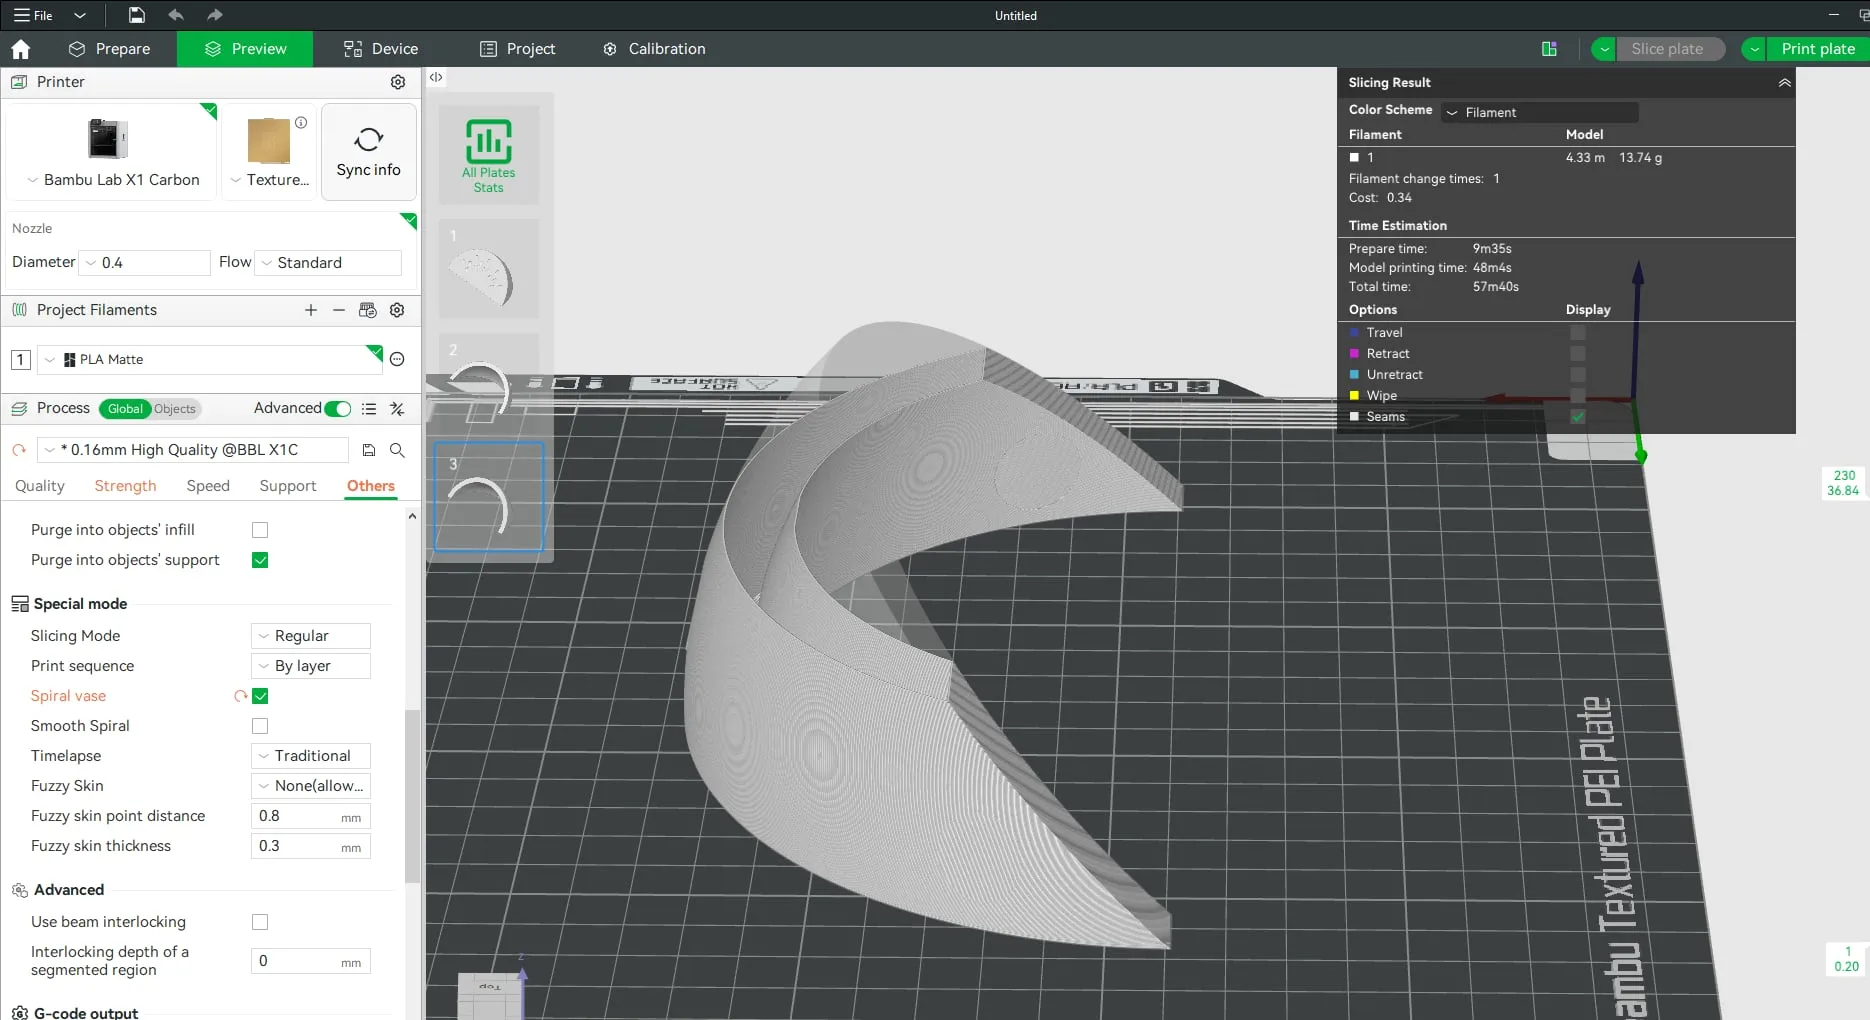
My goal was to print them hollow so that light could shine through the object. The Vase mode setting in the slicer does exactly that.
At this point, I had four parts, to which I later added a square base with a hole for the LED cable.
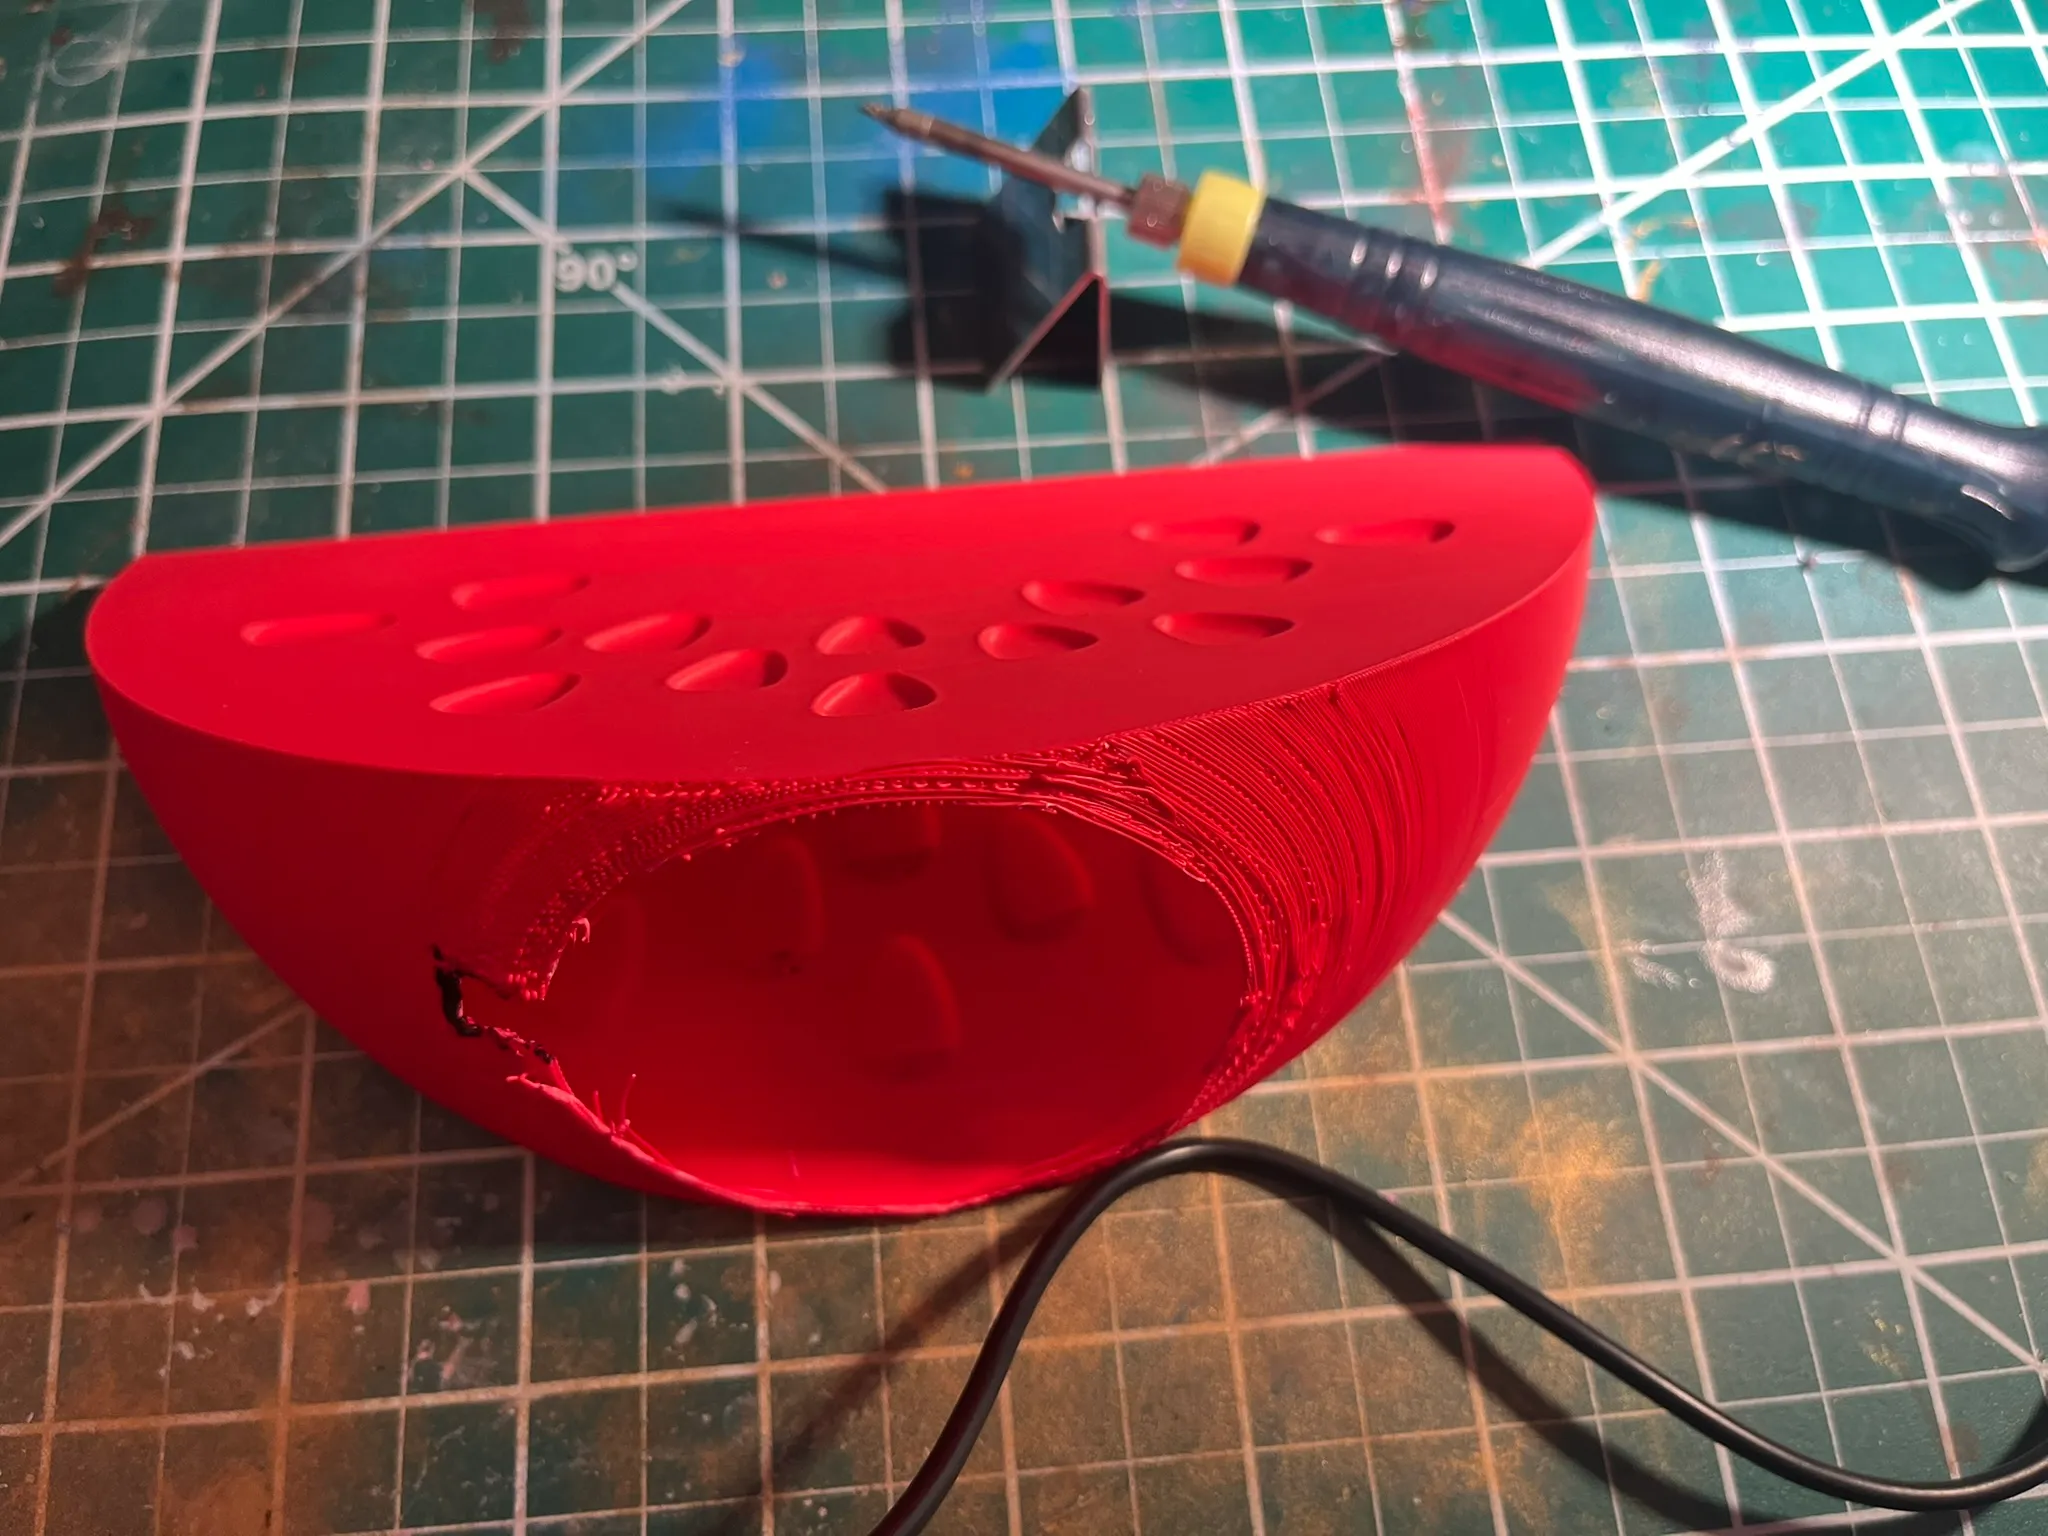
Because I printed with vase mode enabled, I couldn’t include holes in the objects. With a hobby knife, I carved a large round hole in the red part and smaller ones in the white and green parts for the cable.
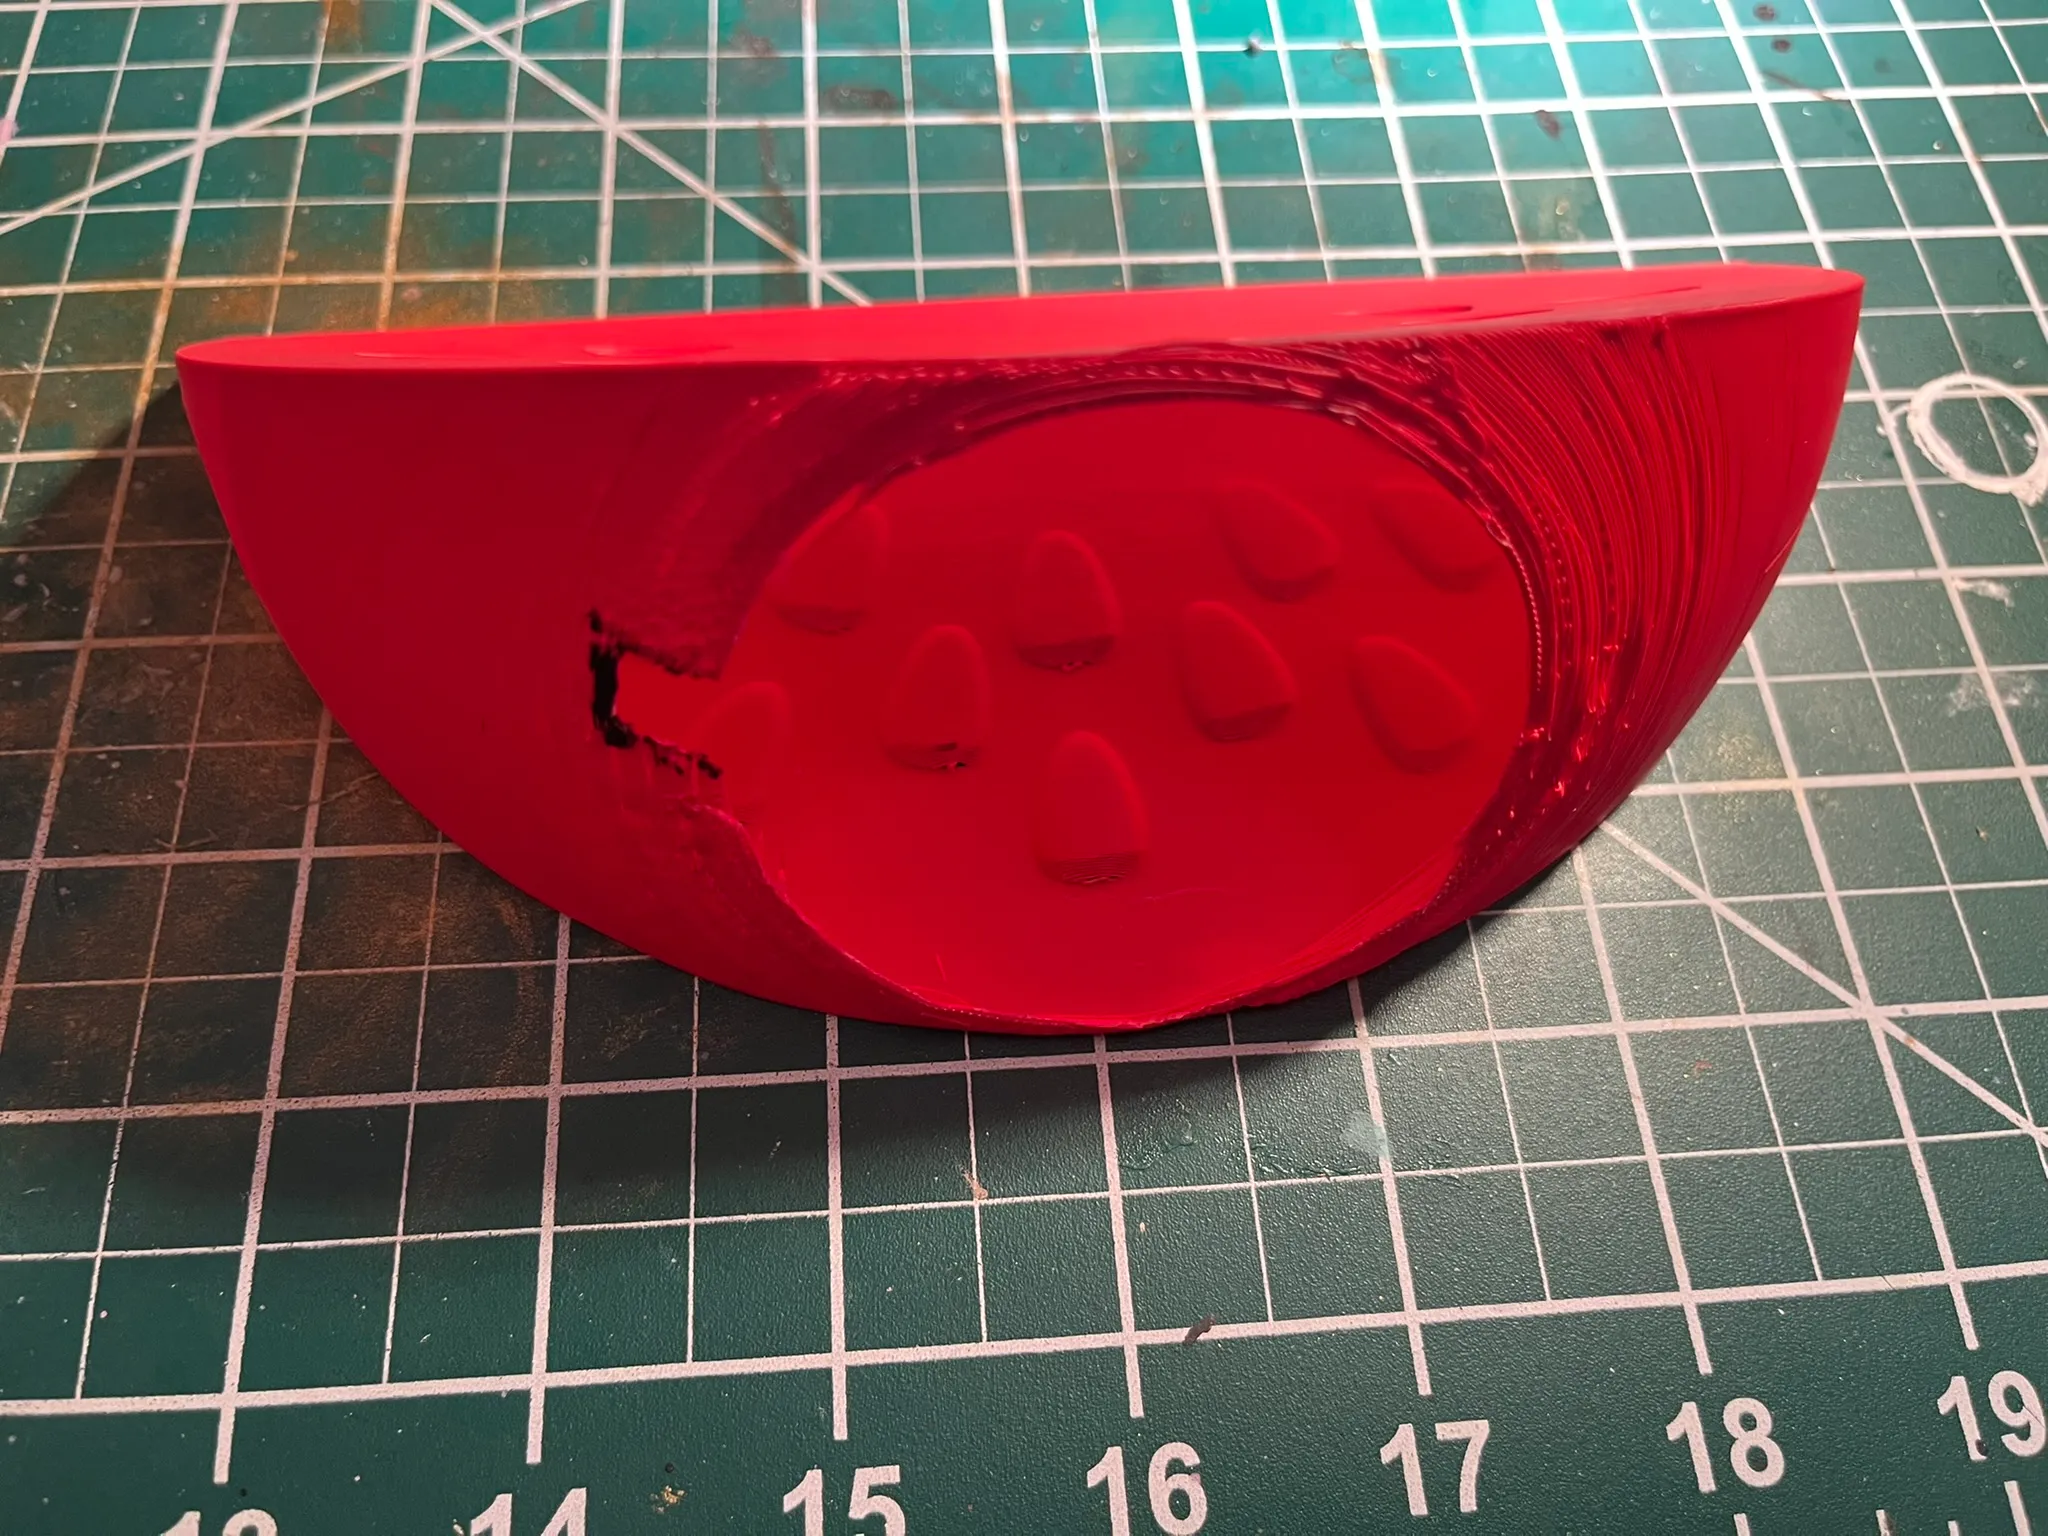
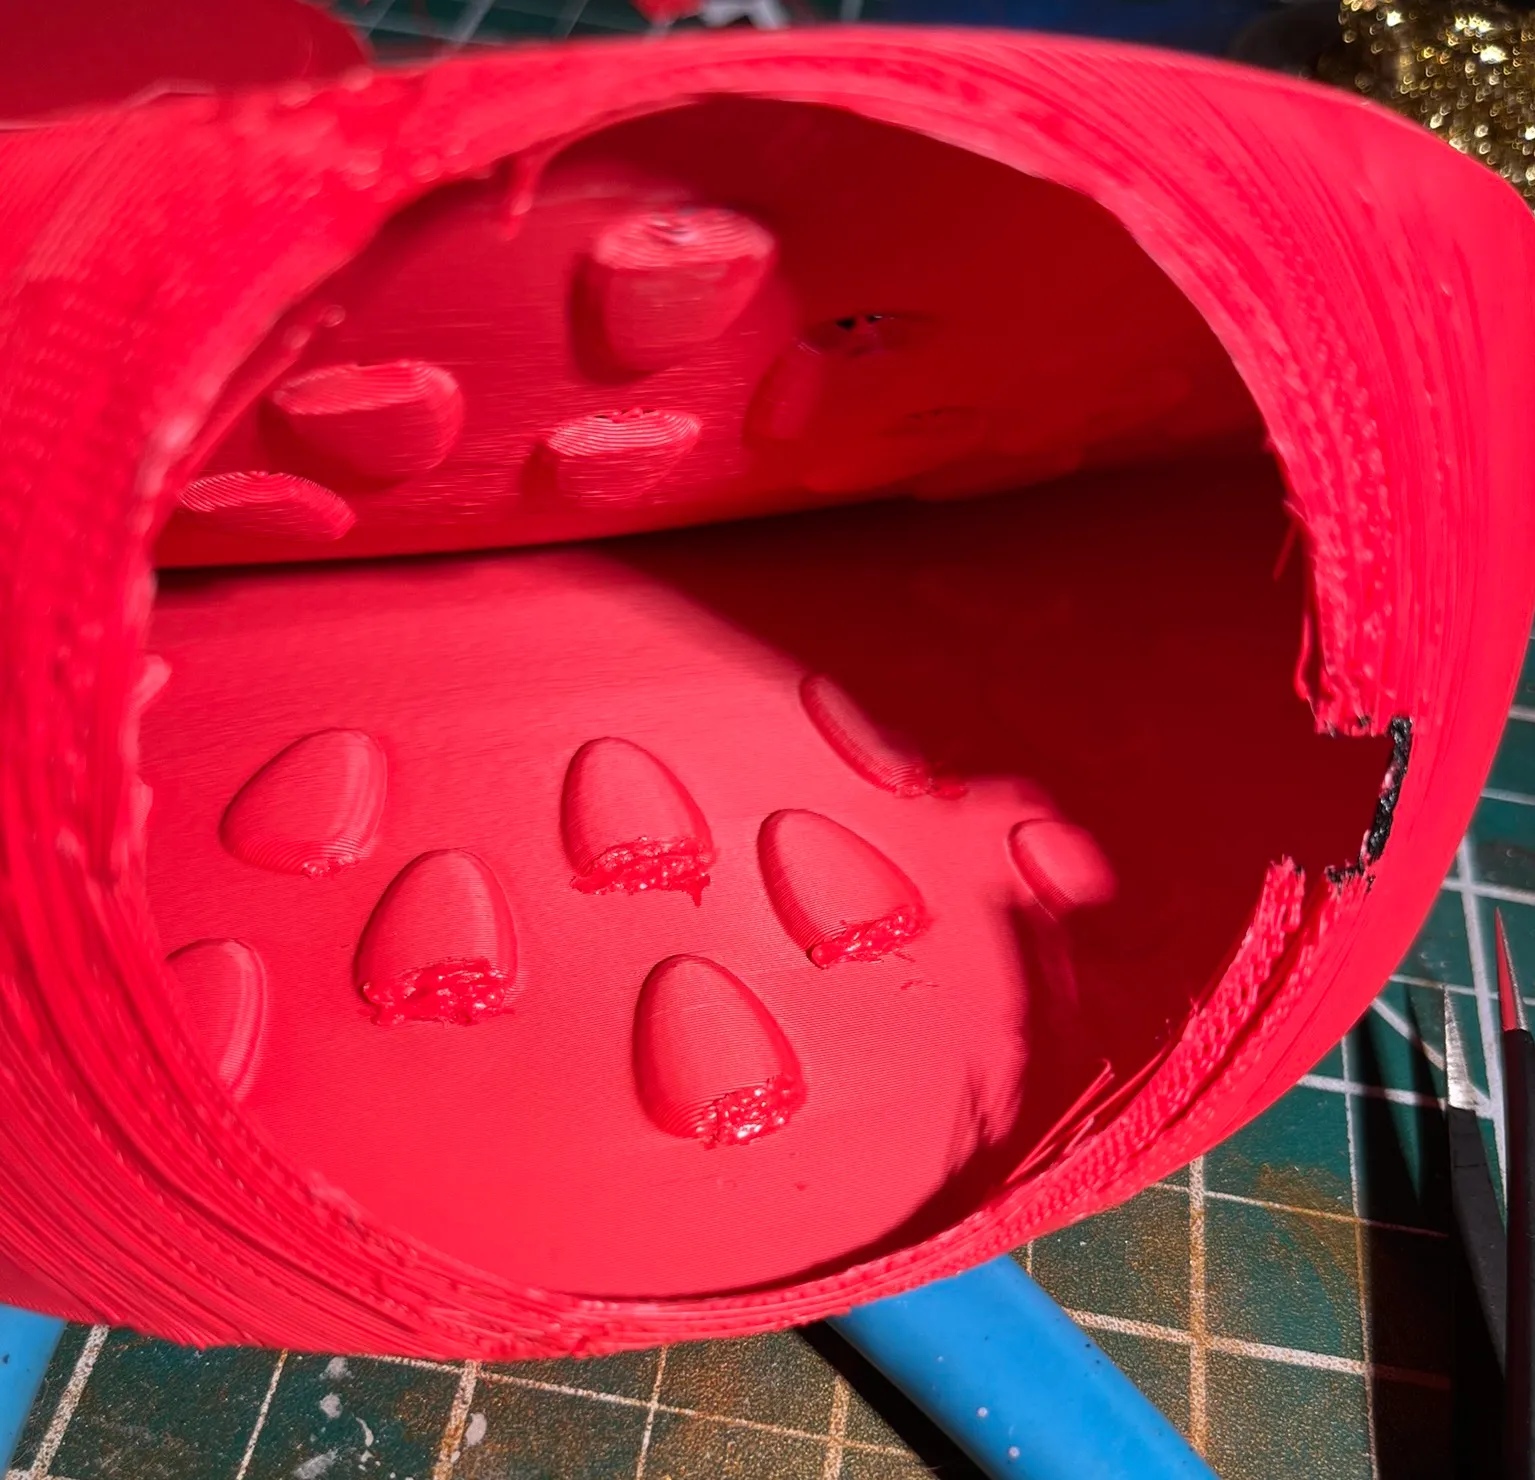
Due to the lack of supports during printing, the red part had tiny holes around the seed openings. I used an old soldering iron and pieces of the plastic I cut out to fill them. You can still see them slightly when the light is on, but it’s not too noticeable.
Melted plastic smells bad. If you ever do this, you should wear a respirator because of the toxic fumes.
I then glued the seeds one by one, painted the green outer part, and assembled everything with the base and LED inside. This was my first “still life” (in 3D) and I’m quite happy with how it turned out.
I used this LED lamp, which fit inside.
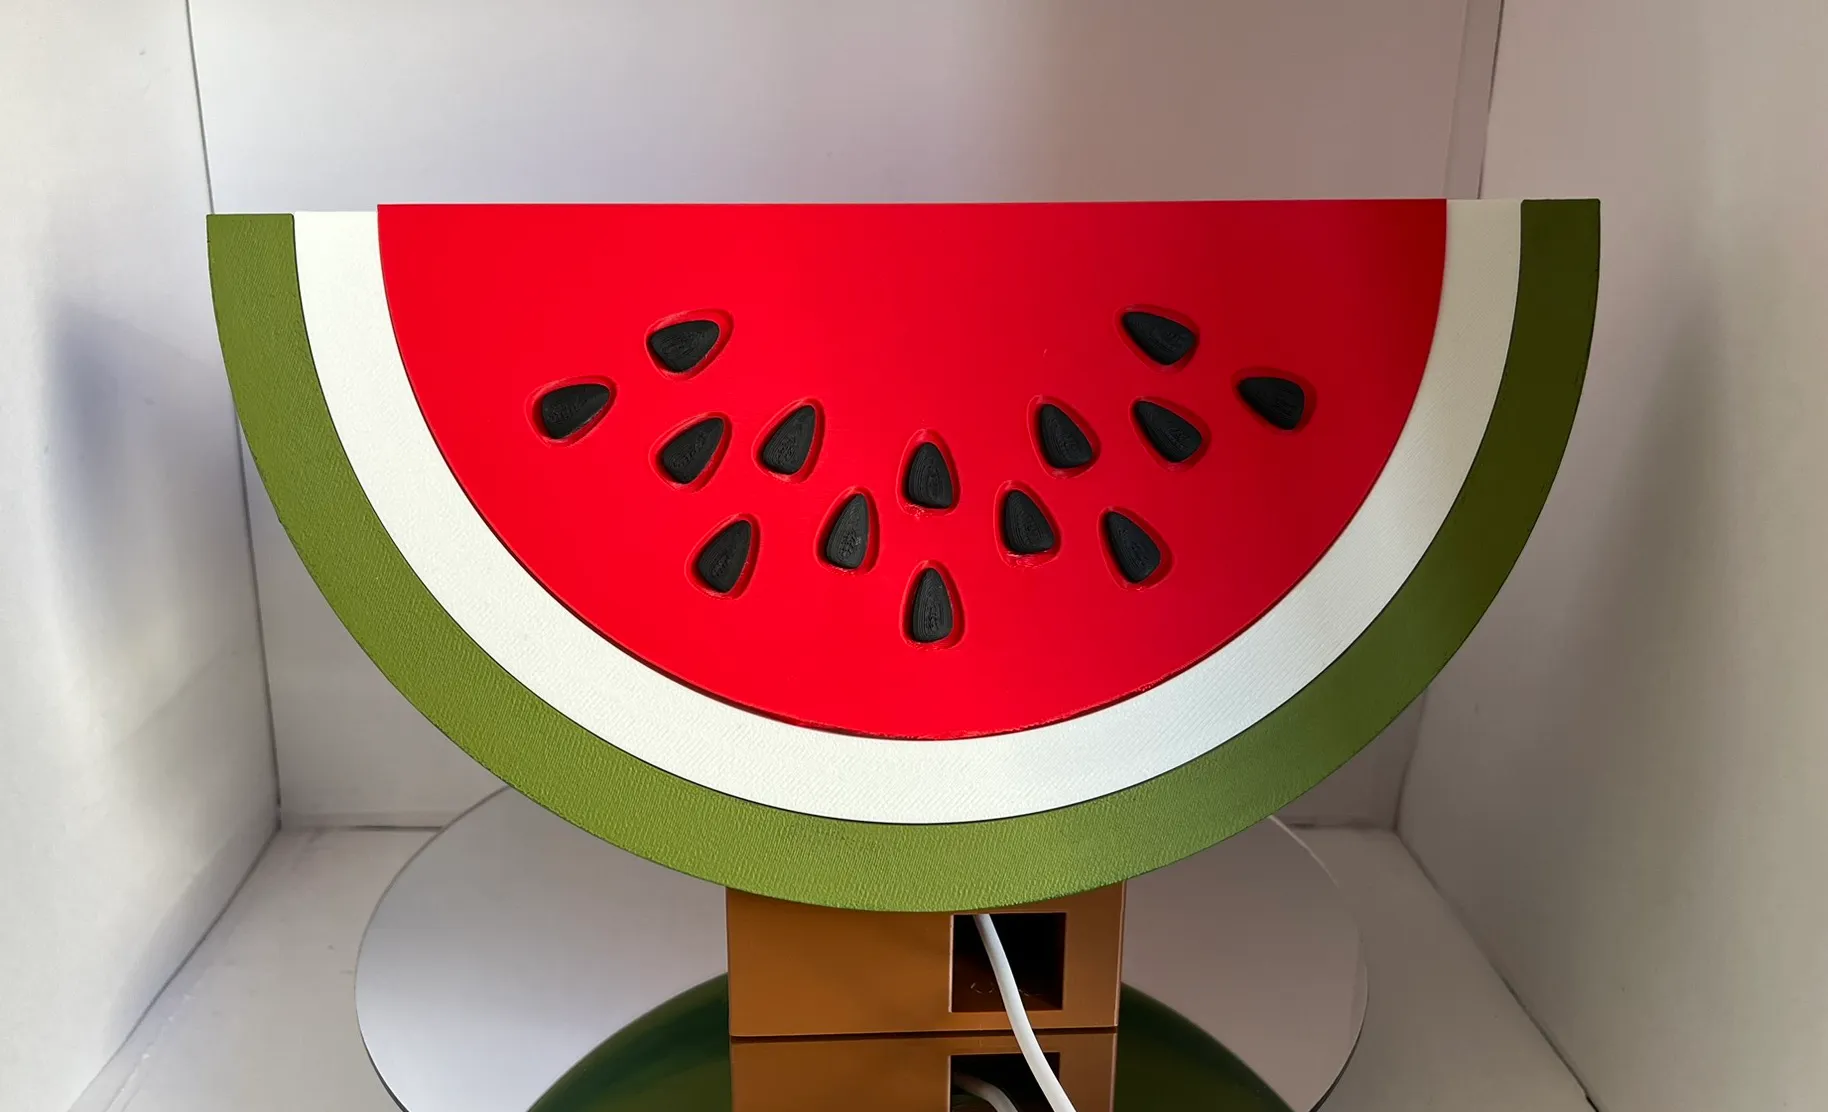
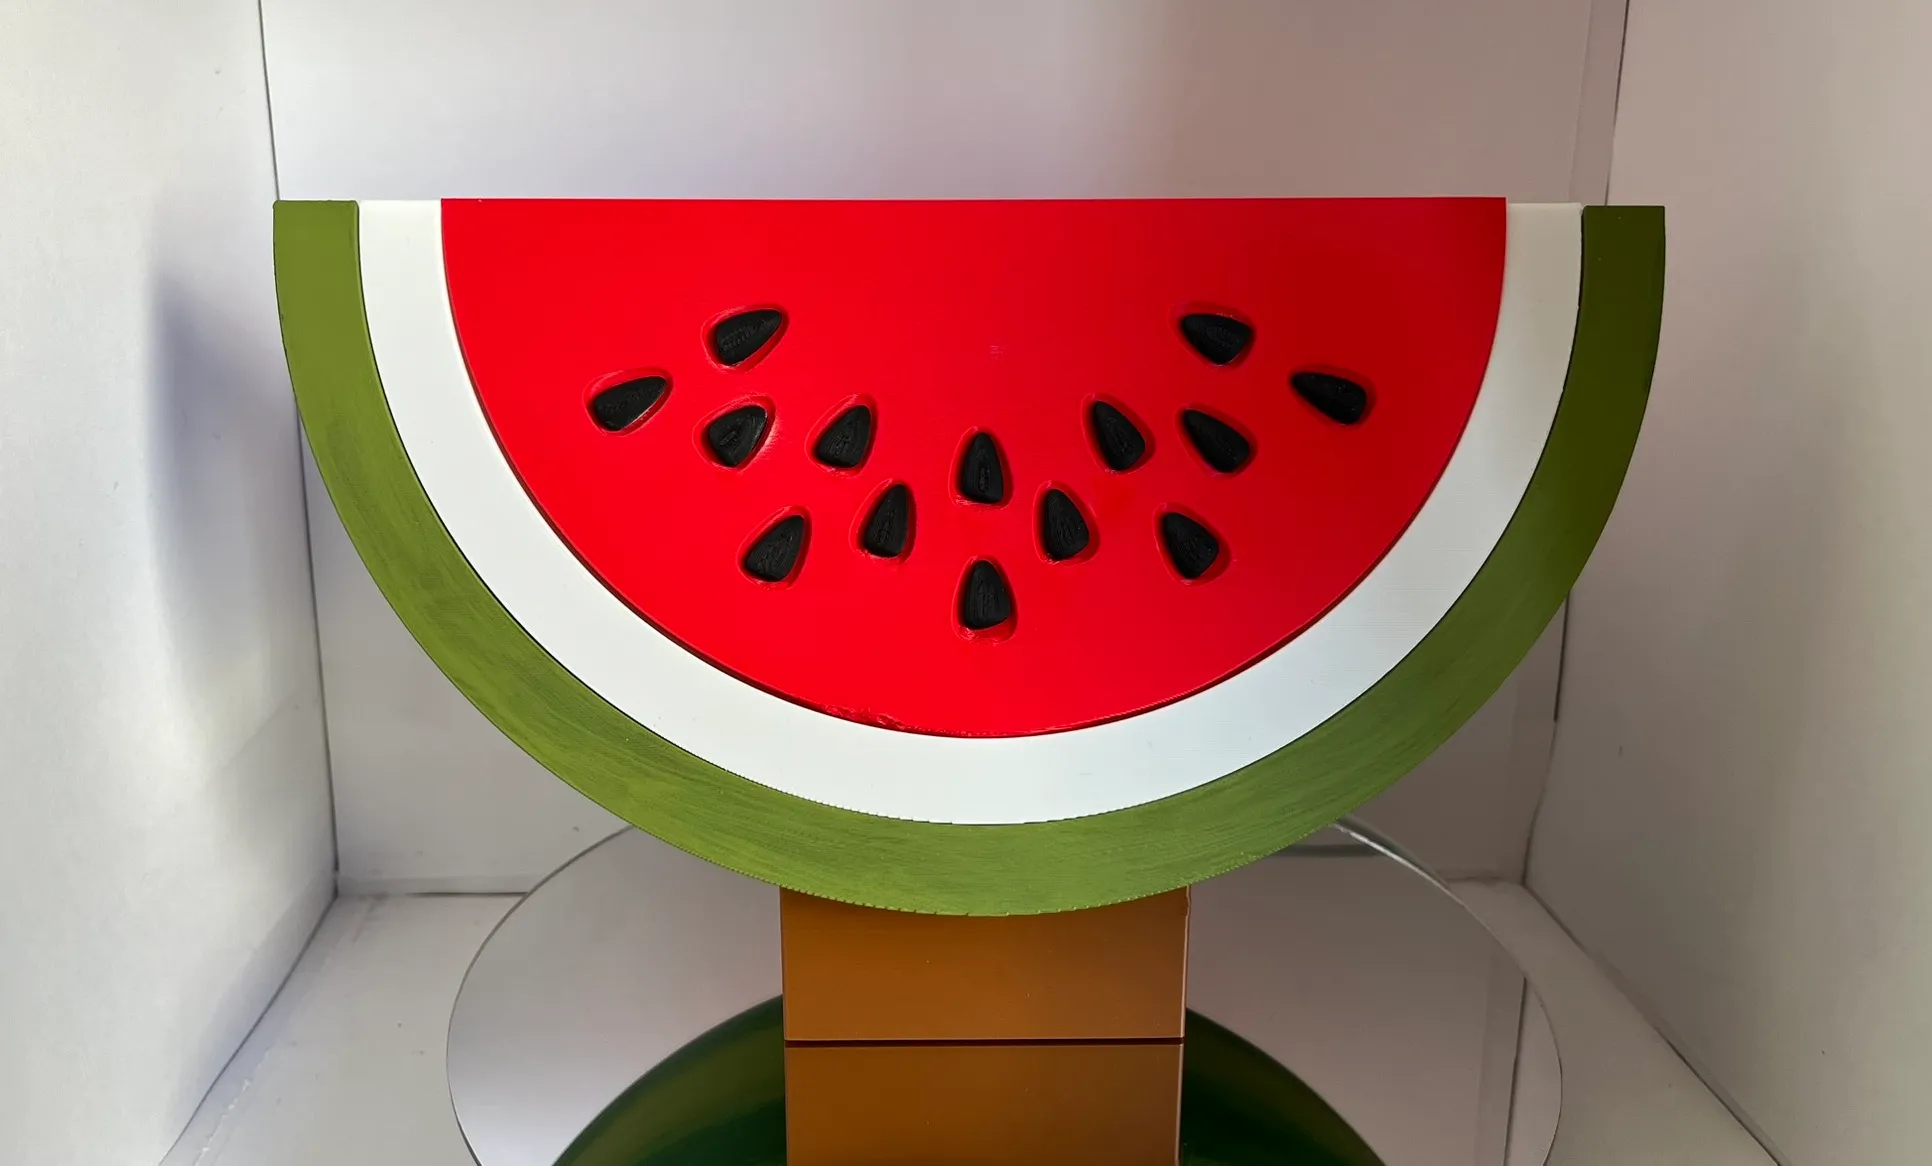
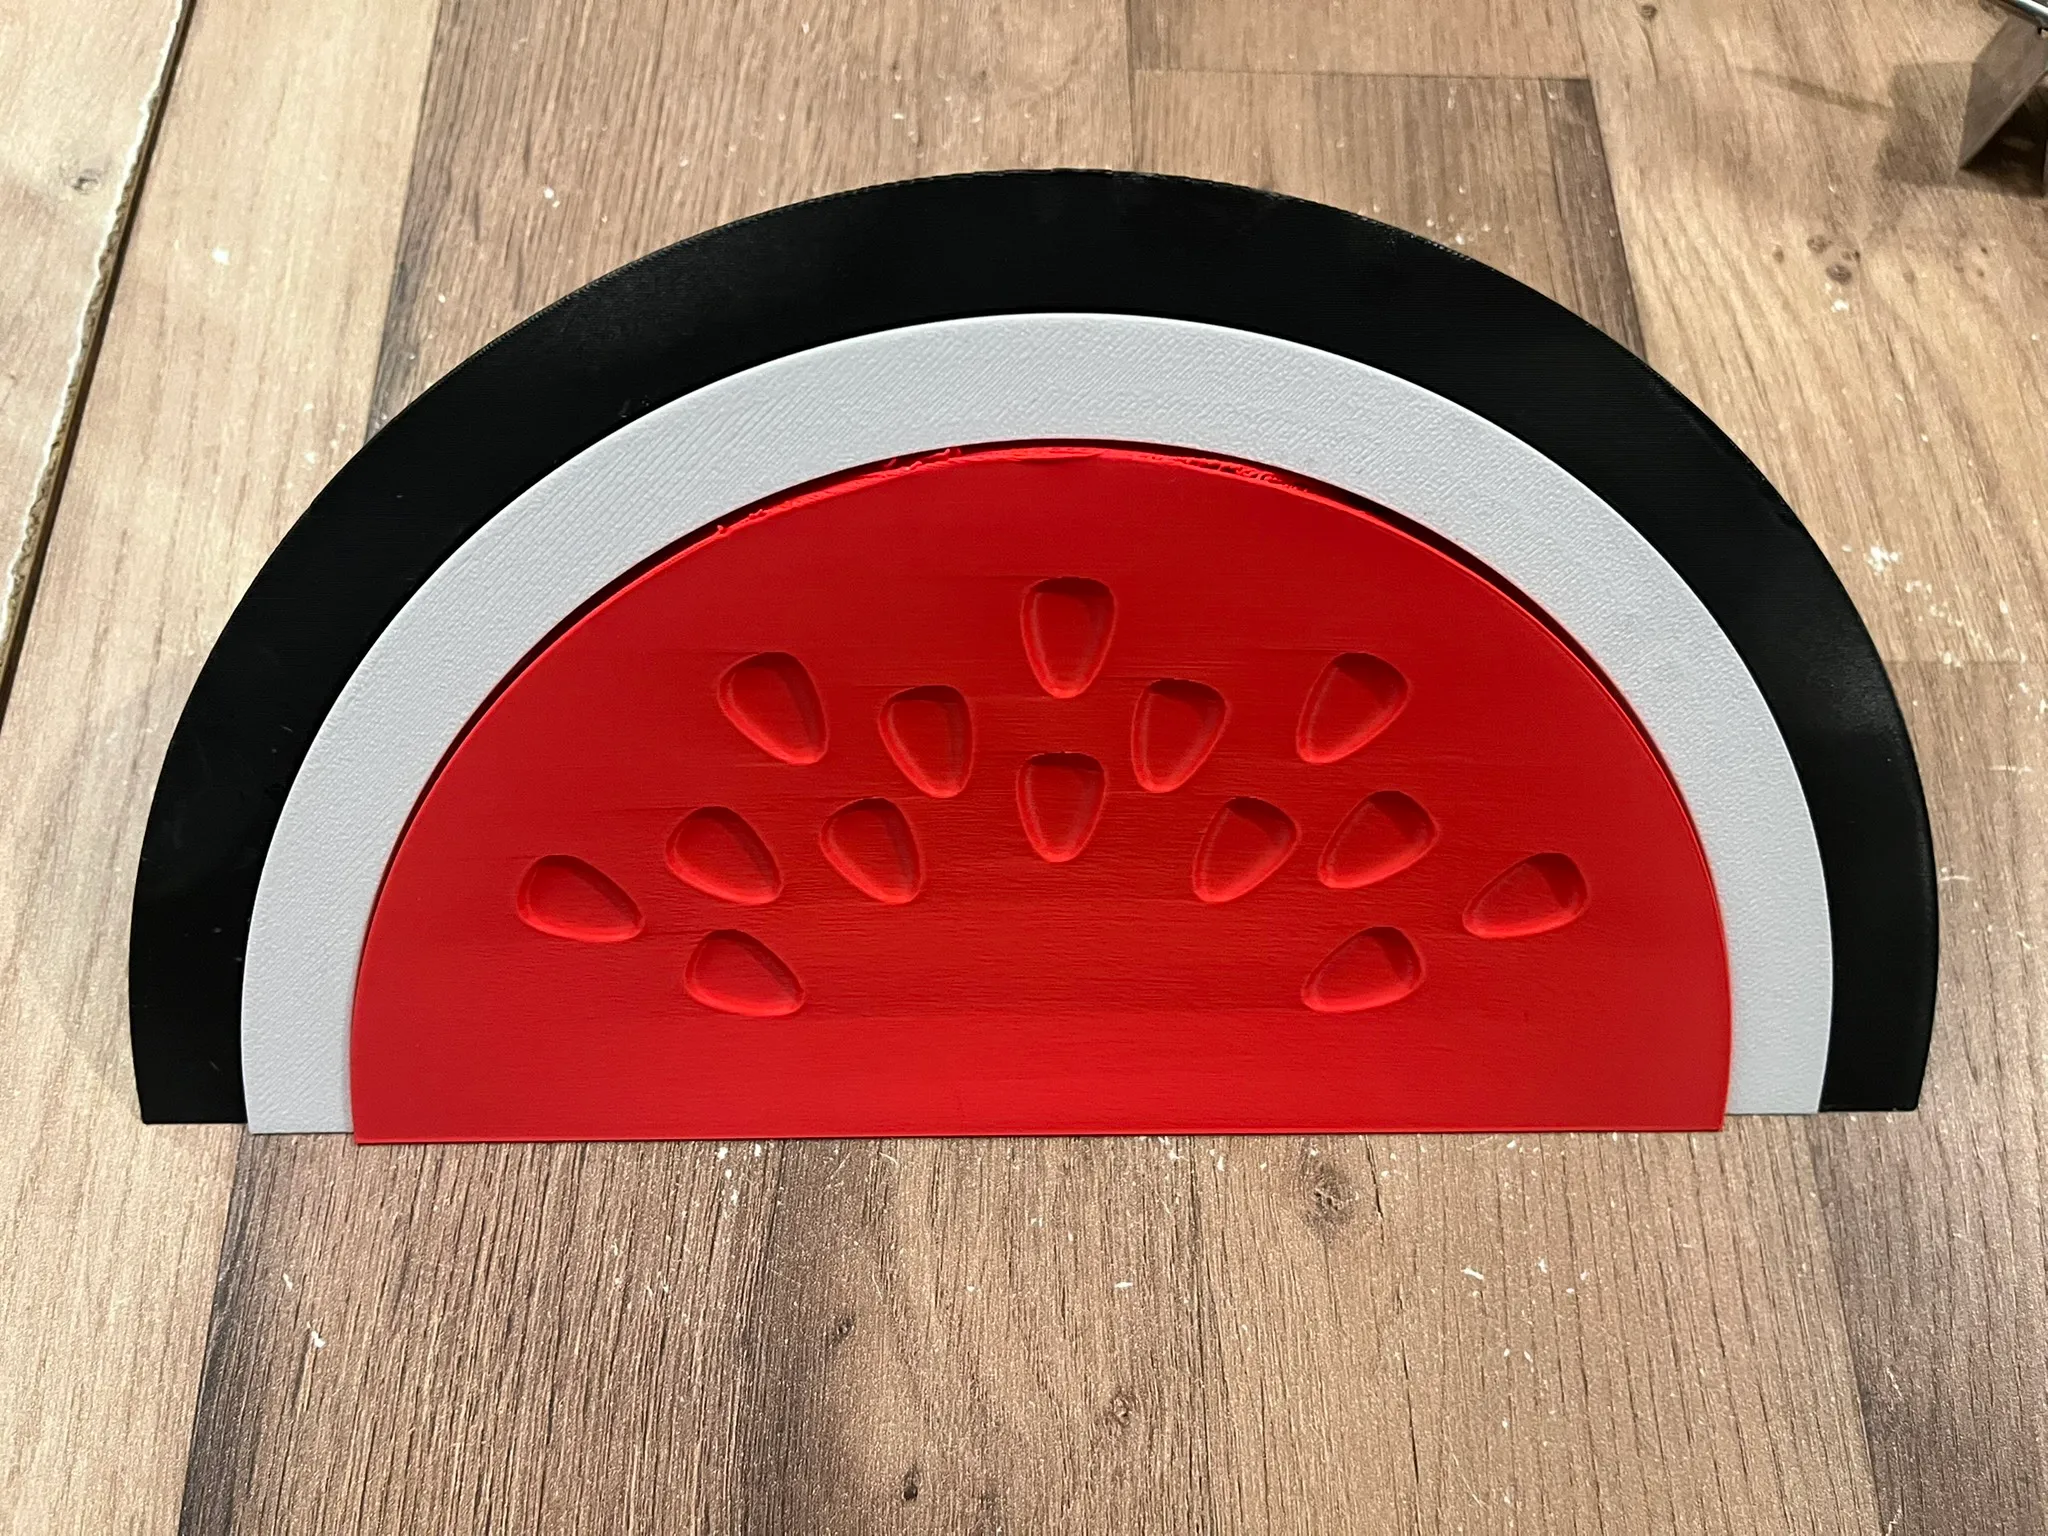
And here’s the final result from a better angle: