Getting Started with Resin Printing - Printing
Your first resin print
Printing your first model
Printer setup and calibration
On most modern resin printers, the main physical setup step is leveling the build plate. Some printers may also require a Z-offset adjustment depending on the design. I recommend you follow your own machine’s manual carefully.
You may also find setup videos or tutorials from your printer manufacturer useful:
Once it’s done, you usually won’t have to worry about it again for a few months, unless you whack your printer by accident or move it around.
A first model to print
For resin printers, exposure calibration models are usually more useful than general-purpose benchmarks.
Common beginner calibration models include:
3DBenchy is also widely used as a general 3D printing benchmark model.
This file will most likely be a .stl (Stereolithography) or .obj (Object) file which you can import on your chosen slicer software.
Slicing
Slicer software
A 3D printer does not directly understand a 3D model file such as .stl, .obj, or .3mf.
Before printing, the model needs to be converted into instructions the printer can follow. This process is called slicing.
Common slicers include:
- Lychee - Good user experience and strong support automation features. Some features such as hollowing require a subscription.
- Chitubox - Commonly bundled or recommended by many manufacturers.
- PrusaSlicer - Supports resin printing workflows mainly for Prusa printers and some third-party workflows.
Each slicer can save a scene or project containing multiple models, using its own native file format. (.lys for Lychee, .chitubox for Chitubox, .3mf for PrusaSlicer). When exporting a project for printing, the slicer generates a file format compatible with your printer. (Common export formats include .ctb, .photon, .phz, .pwmo)
Supports
You will not add supports to your calibration model, however, the need for them should arise soon after.
Most resin prints require supports for overhangs and isolated sections of a model.
Slicers can generate supports automatically, which is usually sufficient for beginners.
General recommendations:
- Angle models slightly instead of printing perfectly flat - This reduces suction forces by decreasing the surface area cured per layer.
- Avoid large unsupported overhangs
- Check for “islands” in the slicer preview - parts of a layer that would print without support beneath it.
Poor supports are one of the most common causes of print failure.
Hollowing large models
You will not hollow out your calibration model, however, the need for this should arise soon after.
Large solid resin prints consume a lot of resin and create stronger suction forces. Most large models should be hollowed in the slicer software.
When hollowing a model add drain holes to ensure uncured resin can escape.
Hollowed models must be thoroughly cleaned inside before curing.
Sealed hollow prints can crack over time, usually after months or even years, if uncured resin remains trapped inside.
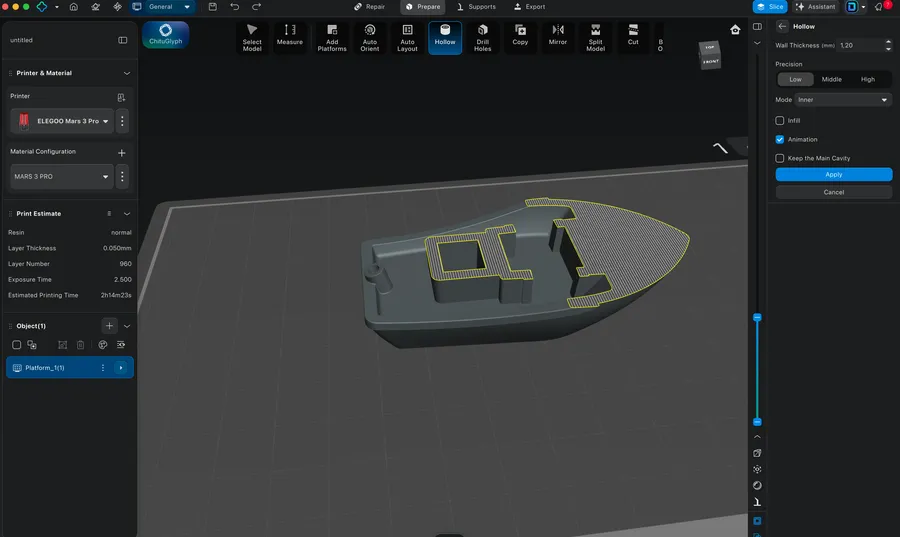
Chitubox Slicer: Hollow parameter
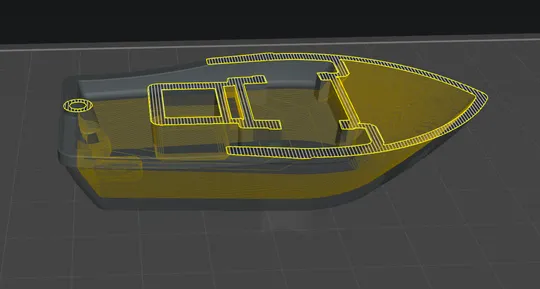
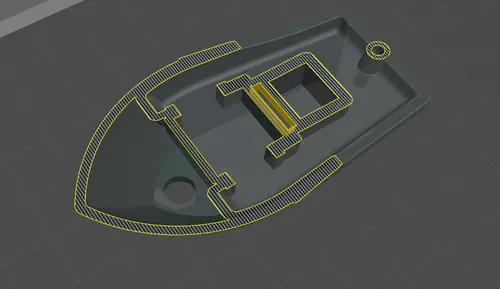
Chitubox Slicer: Hollowed model with hole
Slicer parameters
Printer parameters
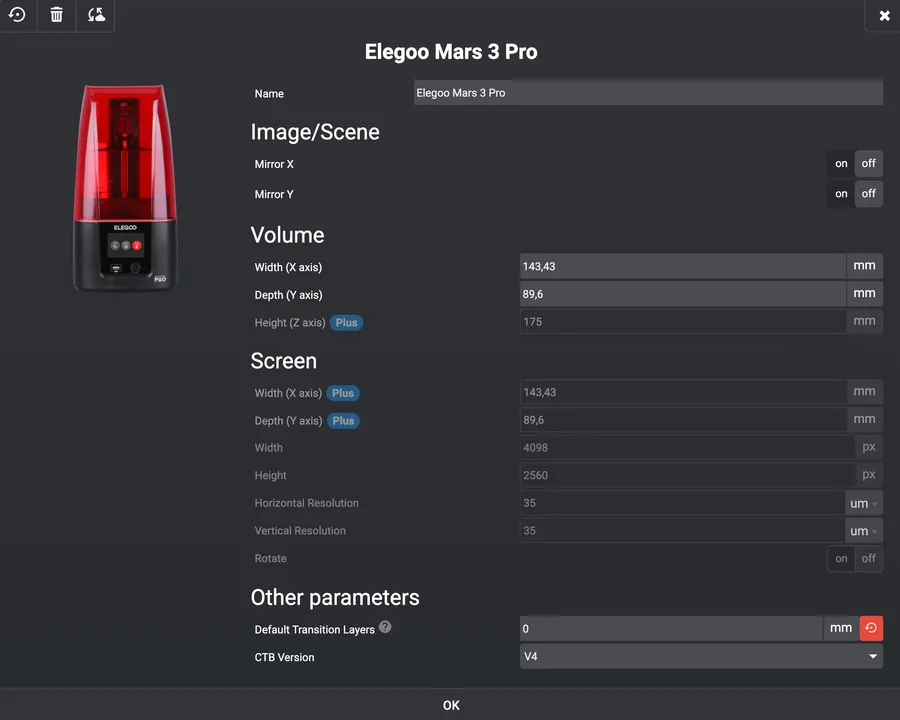
When first launching your slicer software you will be prompted to choose your printer, you will be given default printer parameters based on your machine. For most users, the default printer parameters provided by the slicer are sufficient.
Lychee Slicer: Printer parameters
Resin parameters
Each resin has its own recommended parameters, you’ll find your own either on your bottle, or on your manufacturer’s website such as:
Many slicers also provide community-maintained resin profiles.
Default resin profiles are only starting points. Different printers, temperatures, and resin batches may require exposure adjustments.
Calibration models such as the Validation Matrix or Cones of Calibration help determine proper exposure settings.
If adjustments are needed, these are the first parameters to tune:
- Normal exposure time - How long each layer cures. Controls detail vs failures.
- Burn In/Bottom exposure time - Longer exposure for initial layers to ensure adhesion to the build plate.
- Burn In/Bottom layers - Number of heavily exposed initial layers. Too many can reduce dimensional accuracy. Excessive values may cause “Elephant foot.
- Layer height/thickness - Vertical resolution. Lower = more detail, slower.
- Lift distance - How far the plate lifts between layers. This affects suction, too little causes incomplete separation, too much slows the print.
- Lift speed - How fast the plate lifts. Slower reduces print detachment.
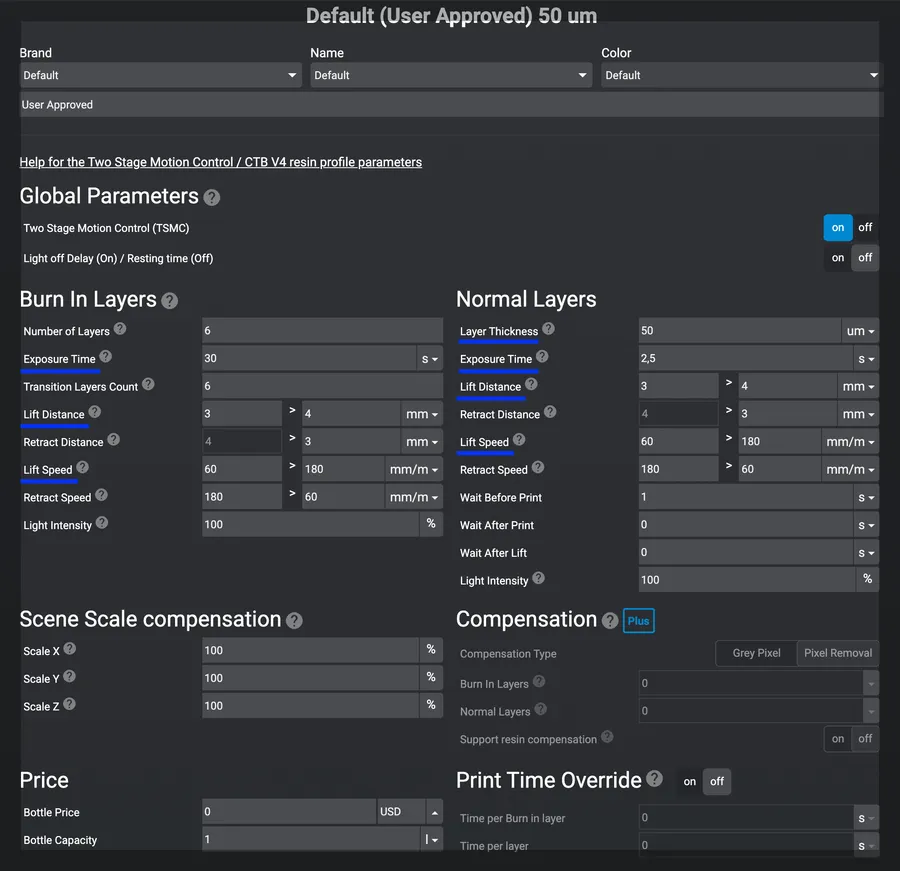
Lychee Slicer: Resin parameters
Before starting your print
Resin preparation
Before starting a print, shake the resin bottle thoroughly.
If resin has been sitting in the vat for a while, pigments may separate. You can gently stir it using a soft silicone spatula or plastic tool designed for resin vats.
Resin temperature
Most standard resins print best around 20-30°C.
Cold resin becomes more viscous and can cause:
- failed supports
- incomplete layers
- poor adhesion
If printing in a cold environment, you may warm the sealed resin bottle in lukewarm water before use. Dry the bottle before opening it to avoid introducing water into the resin.
Vat inspection
Before starting a new print, inspect the resin vat for cured debris or failed print fragments. Printing over hardened resin pieces can damage the vat film or LCD screen.