Getting Started with Resin Printing - Post-print
What to do once you have printed a model
Post-Print Cleanup and Curing
I’ll detail the post-processing steps I personally use, based on experience and information gathered from various YouTube videos, forums, and guides. There is no single correct workflow. Most people adapt the process to their equipment, workspace, and resin type.
Tools
As we saw in Safety, here is the list of protective gear I use:
- a) Respirator with organic vapor cartridges (P100 or equivalent)
- b) Nitrile gloves (not latex)
- c) Safety glasses
- d) UV protection glasses: curing light can harm eyes and skin
These are the main tools and materials I use for post-processing:
- Isopropyl alcohol (IPA) - for cleaning uncured resin
- Squeeze wash bottle with nozzle - for targeted IPA rinsing
- Disposable wipes or paper towels - for cleaning tools and surfaces
- Plastic or silicone spatula - for stirring resin and handling soft residue in the vat
- Metal scraper - for removing prints from the build plate
- Silicone mat - for protecting the workspace
- Plastic trays (x3) - to separate the different cleaning stages
- Plastic storage containers (x3) - used as IPA baths and temporary support disposal containers
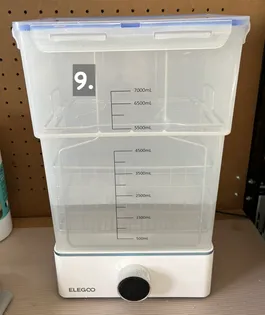
- Wash station - for cleaning prints and small tools
- 3D FDM printed build plate drain bracket - to let resin drip back into the vat after printing
- Precision side cutters - for removing supports
- Curing station - for curing prints and contaminated disposable materials
- I added reflective aluminum surfaces inside mine to improve light distribution
- UV lamp - for curing the inside of hollow models and curing small resin residue on tools or work surfaces
- Silicone or plastic funnel - for pouring resin back into the bottle
- Metal coffee filter or paint filter - for filtering resin before reuse
- Magnetic sun shade or printer cover - to reduce accidental UV exposure
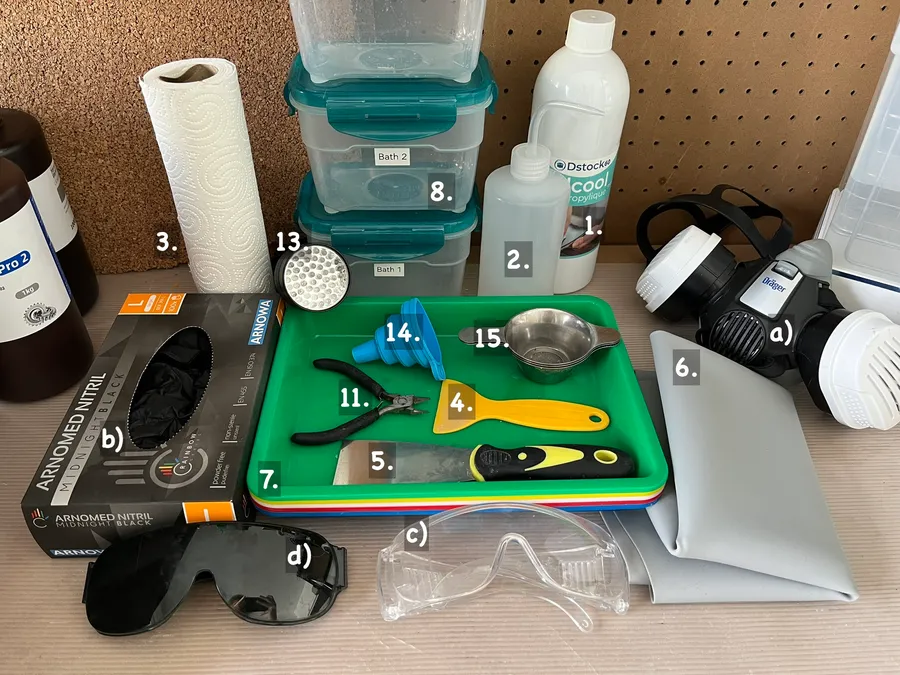
List of tools I use
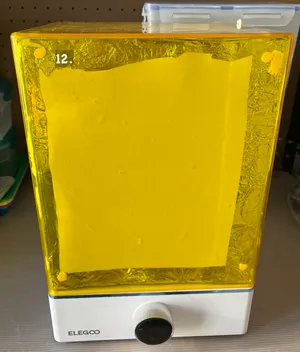
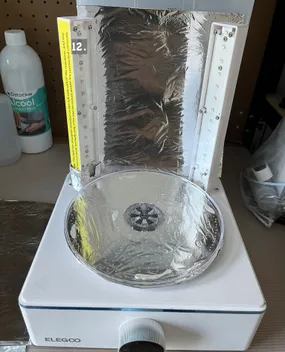
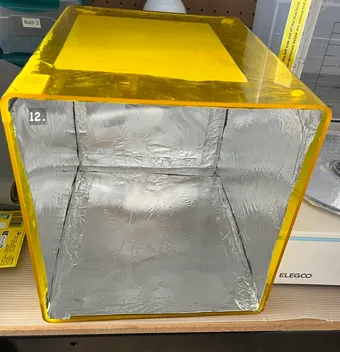
Curing station
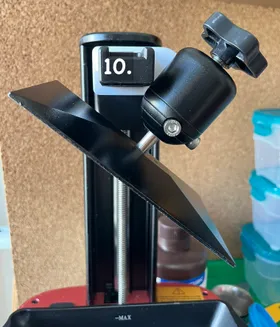
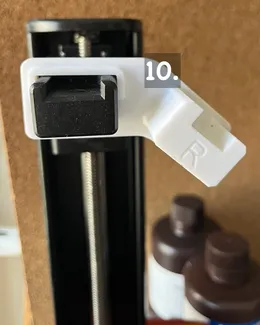

Printed drain bracket, magnetic shade and wash station
Step-by-step workflow
- Put on your protective equipment. Refer to Safety.
- Let the build plate drain using the drain bracket while preparing the rest of your tools:
- open IPA baths
- prepare the curing station
- get clean wipes ready
- Move the build plate onto tray 1. Use a metal scraper to remove the prints from the build plate.
- Reattach the build plate to the printer. Spray IPA onto a wipe and clean the build plate. Place the contaminated wipe onto tray 3.
- If necessary, separate connected prints using your hands or precision side cutters.
- Place the prints with their supports into IPA bath 1 and agitate gently to remove most of the resin.
- Repeat the process in IPA bath 2 for a cleaner rinse.
- Move the prints onto tray 2. Remove the supports and place them into a separate waste container.
- Place the prints into the wash station and run it for approximately 5 minutes.
- While the wash station runs:
- cure contaminated wipes and supports
- close IPA containers
- clean trays and tools as needed
- Remove the prints from the wash station and let them dry completely.
- Clean reusable tools in the wash station if necessary.
- Store cured supports and cured wipes in a designated waste container.
- Wipe down bottles, trays, and machine surfaces using IPA and clean wipes.
- Cure the prints in the UV curing station.
- Curing time varies depending on the resin, model size, and curing setup. Small prints may only require a few minutes, while larger or darker models may require longer exposure.
- Ensure all IPA has fully evaporated before curing.15. Remove gloves carefully without touching the contaminated outer surface.
- Cure contaminated disposable materials before disposal according to local regulations. Refer to Environment and Waste Disposal
Notes:
- Very small objects get bathed by hand, not by the wash station
- My curing station is mostly covered and not in sight in my setup, if you see it while it runs, wear UV protection glasses
- Removing supports before curing is easier since partially cured resin is usually less brittle
Alternative workflows
Some people:
- Use more or fewer IPA baths
- Use soft brushes or toothbrushes for cleaning
- Cure prints underwater to improve UV light diffusion and reduce oxygen inhibition
- Use sunlight instead of a curing station
- Use dedicated UV lamps instead of enclosed curing stations
Resin switching
- Put on your protective equipment. Refer to Safety
- Open bath 1, 2, and wash station
- Place your resin bottle into a tray and open it
- Add a funnel and a metal coffee filter on top
- Open your printer’s lid, unscrew the resin vat
- Carefully pour the resin into the bottle
- If needed, wipe the resin vat with a plastic scraper
- Clean the funnel and metal filter in bath 1, then bath 2, and finally in the wash station for approximately 5 minutes.
- Place the resin vat over bath 1 or 2 and rinse it with IPA using the squeeze bottle.
- With an IPA-soaked wipe, clean the resin vat and the top of the bottle
- Put the wipe into a waste container and cure it for approximately 5 minutes in the curing station.
- Dispose of contaminated wipes according to your resin waste workflow. Refer to Environment and Waste Disposal
Cleaning the vat after failures
I’ve seen two ways here, either you empty it following the same steps as Resin switching, or use the printer’s built-in vat cleaning function if available.
If you use the printer’s built-in vat cleaning function, it’ll produce a cured resin sheet at the bottom of the resin vat. Here are the steps: 0. Put on your protective equipment. Refer to Safety
- Open your IPA baths
- Carefully lift one corner of the cured resin sheet using a plastic scraper.
- Let the resin sheet drip back into the vat
- Wash the sheet in bath 1, then bath 2
- Place the sheet into a storage container
- Cure the sheet in your UV curing station
Troubleshooting
The 3D printing community is rather huge, you’ll find tutorials on YouTube, help on manufacturers forums, or on Reddit (r/resinprinting, r/3Dprinting).
Failed Prints
Most failures in resin printing can be diagnosed by what physically happened to the print rather than guessing the cause directly.
Most resin failures are caused by three things:
- insufficient adhesion to the build plate
- incorrect exposure settings
- poor support or model orientation
Typical failures
Print did not stick to the build plate
Possible causes:
- Build plate not leveled correctly
- Bottom exposure time too low
- Build plate or vat film contaminated
- Resin temperature too low
Fixes:
- Re-level the build plate
- Increase bottom exposure time in small steps
- Clean build plate with IPA
- Ensure resin is within recommended temperature range (usually 20-30°C)
Print stuck to the FEP/PFA film instead of the build plate
Possible causes:
- Weak adhesion to build plate
- Excessive suction from large cross-section layers
- Low bottom exposure time
- Damaged or worn release film
Fixes:
- Increase bottom exposure time
- Tilt the model in the slicer to reduce suction area
- Inspect and replace the vat film if damaged
Layers missing or partial prints (print stops mid-air)
Possible causes:
- Supports too weak or missing
- “Islands” not supported in slicer
- Resin flow issues or debris in vat
- Mechanical lift issues
Fixes:
- Regenerate supports or increase support density
- Check slicer for islands (parts of a layer that would print without support beneath it.)
- Filter resin and clean vat
- Verify build plate movement and tightness
Brittle or cracked prints
Possible causes:
- Over-curing
- Resin type not suited for mechanical stress
- Incorrect exposure settings
- Thin unsupported geometry
Fixes:
- Reduce curing time
- Use tougher resin (ABS-like or similar)
- Adjust exposure slightly down if overexposed
- Reinforce model thickness or supports
Soft or sticky surface after curing
Possible causes:
- Incomplete washing (IPA contamination)
- Insufficient curing time
- Resin residue trapped in details
Fixes:
- Wash longer in clean IPA (use two-bath system if possible)
- Ensure prints are fully dry before curing
- Increase curing time slightly